Difference between revisions of "Customize your scheduling page"
| (4 intermediate revisions by the same user not shown) | |||
| Line 1: | Line 1: | ||
| + | __FORCETOC__ | ||
<p> | <p> | ||
| − | Scheduling pages allow your invitees to book the meetings with you. Out of the box, organization and personal scheduling pages have a sleek and clean look with | + | Scheduling pages allow your invitees to book the meetings with you. |
| + | Out of the box, organization and personal scheduling pages have a sleek and clean look with customizations built right into Appearance settings that | ||
| + | can be customized without changing the code and our default CSS. | ||
| + | If you want to customize your scheduling page further and match your brand seamlessly, put your team's CSS skills to work and create your own stylesheet. | ||
</p> | </p> | ||
<p> | <p> | ||
This article covers all of the customization options scheduling page offers. | This article covers all of the customization options scheduling page offers. | ||
</p> | </p> | ||
| − | <h2>Appearance | + | <h2>Personal-level vs. Organization-level Appearance</h2> |
<p> | <p> | ||
| − | + | 1. Go to the [https://secure.simplymeet.me/panel/appearance Appearance] page. | |
</p> | </p> | ||
<p> | <p> | ||
| − | + | 2. The user-friendly editor will open where you can change the colours of the personal scheduling page, no custom coding necessary. | |
</p> | </p> | ||
<p> | <p> | ||
| − | [[File: | + | 3. You can upload your company logo, avatar, banner image and disable SimplyMeet.me branding(paid plans only). |
| + | </p> | ||
| + | <p> | ||
| + | [[File:Example. appearance settings.png|1200px|center|link=https://help.simplymeet.me/images/a/a5/Example._appearance_settings.png]] | ||
| + | </p> | ||
| + | <p> | ||
| + | 4. For the organization level simply select '''Organization account''' tab there, make the necessary adjustments and save settings. | ||
</p> | </p> | ||
<h2><br> | <h2><br> | ||
| − | Personal-level vs. Organization-level CSS | + | Personal-level vs. Organization-level CSS (paid plan only) |
</h2> | </h2> | ||
<p> | <p> | ||
| − | Organization-level CSS will be loaded when you open | + | Organization-level CSS will be loaded when you open teammates scheduling link in your organization or the organization scheduling page. |
</p> | </p> | ||
<p> | <p> | ||
<span style="font-weight: normal;">Personal-specific CSS gets loaded only on the personal scheduling page.</span> | <span style="font-weight: normal;">Personal-specific CSS gets loaded only on the personal scheduling page.</span> | ||
</p> | </p> | ||
| − | |||
<p> | <p> | ||
Add your own CSS by directly adding the stylesheets in the settings. You can customize just about everything on your scheduling pages with do-it-yourself custom CSS (e.g. change the font format, size, override defaults colours etc.)! | Add your own CSS by directly adding the stylesheets in the settings. You can customize just about everything on your scheduling pages with do-it-yourself custom CSS (e.g. change the font format, size, override defaults colours etc.)! | ||
</p> | </p> | ||
| − | + | ||
| − | |||
| − | |||
| − | |||
| − | |||
| − | |||
| − | |||
| − | |||
| − | |||
| − | |||
| − | |||
| − | |||
| − | |||
| − | |||
| − | |||
| − | |||
| − | |||
| − | |||
| − | |||
| − | |||
| − | |||
| − | |||
| − | |||
| − | |||
| − | |||
| − | |||
| − | |||
| − | |||
| − | |||
| − | |||
| − | |||
| − | |||
| − | |||
| − | |||
| − | |||
| − | |||
| − | |||
| − | |||
| − | |||
| − | |||
| − | |||
| − | |||
| − | |||
| − | |||
| − | |||
| − | |||
| − | |||
| − | |||
| − | |||
<p> | <p> | ||
| − | + | 1. Go to '''[https://secure.simplymeet.me/panel/appearance Appearance]''' page. | |
| − | |||
</p> | </p> | ||
| − | |||
<p> | <p> | ||
| − | + | 2. Select '''Personal account''' or '''Organization account''' tab depending on the scheduling page you wish to customize. | |
| − | |||
</p> | </p> | ||
<p> | <p> | ||
| − | + | 3. Scroll the page to the <strong>Custom CSS</strong> section to get started. | |
| − | |||
</p> | </p> | ||
<p> | <p> | ||
| − | [[File: | + | [[File:Sm custom css path new.png|1200px|center|link=https://help.simplymeet.me/images/8/82/Sm_custom_css_path_new.png]] |
</p> | </p> | ||
<p> | <p> | ||
| − | + | Just add your CSS using | |
| + | <strong>Custom CSS</strong> field. This CSS will automatically apply to your personal scheduling page. | ||
</p> | </p> | ||
Latest revision as of 13:58, 4 December 2023
Scheduling pages allow your invitees to book the meetings with you. Out of the box, organization and personal scheduling pages have a sleek and clean look with customizations built right into Appearance settings that can be customized without changing the code and our default CSS. If you want to customize your scheduling page further and match your brand seamlessly, put your team's CSS skills to work and create your own stylesheet.
This article covers all of the customization options scheduling page offers.
Personal-level vs. Organization-level Appearance
1. Go to the Appearance page.
2. The user-friendly editor will open where you can change the colours of the personal scheduling page, no custom coding necessary.
3. You can upload your company logo, avatar, banner image and disable SimplyMeet.me branding(paid plans only).
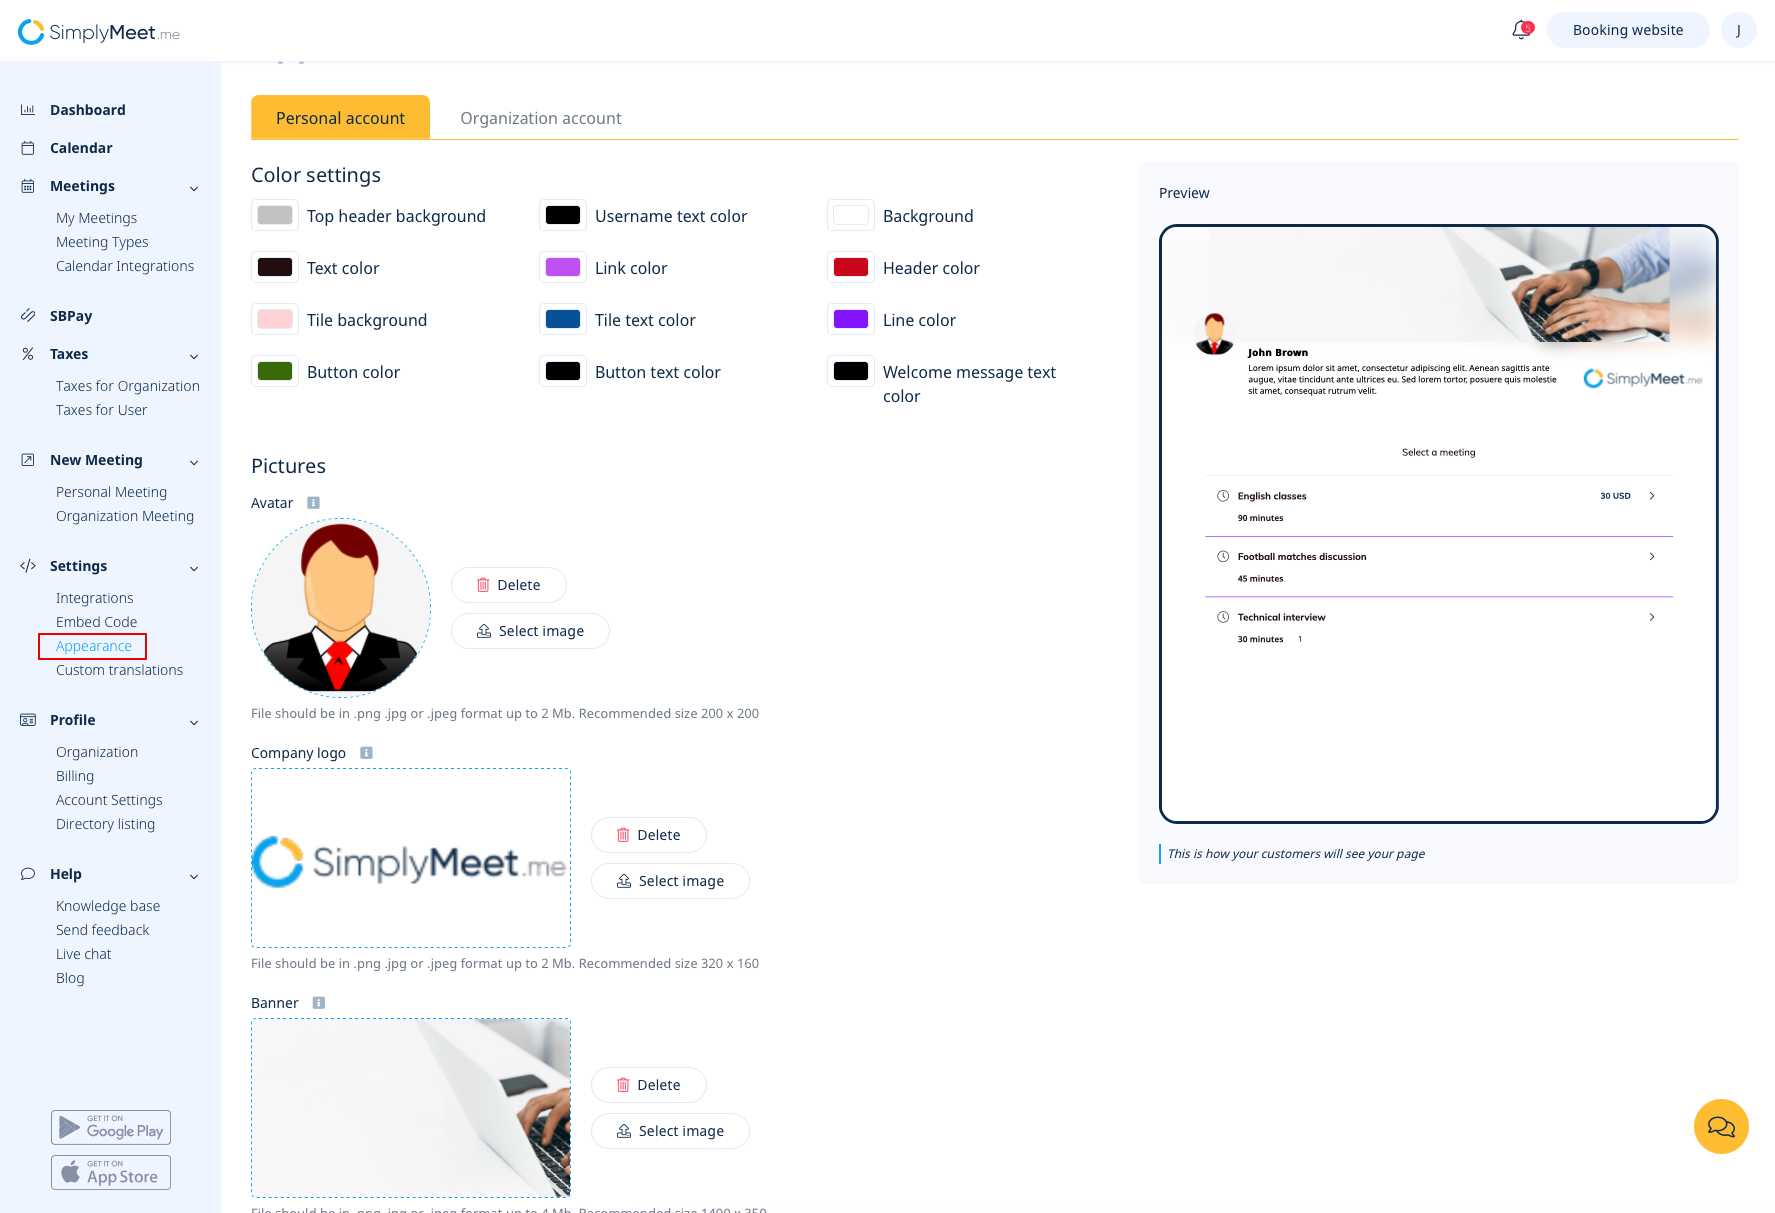
4. For the organization level simply select Organization account tab there, make the necessary adjustments and save settings.
Personal-level vs. Organization-level CSS (paid plan only)
Organization-level CSS will be loaded when you open teammates scheduling link in your organization or the organization scheduling page.
Personal-specific CSS gets loaded only on the personal scheduling page.
Add your own CSS by directly adding the stylesheets in the settings. You can customize just about everything on your scheduling pages with do-it-yourself custom CSS (e.g. change the font format, size, override defaults colours etc.)!
1. Go to Appearance page.
2. Select Personal account or Organization account tab depending on the scheduling page you wish to customize.
3. Scroll the page to the Custom CSS section to get started.
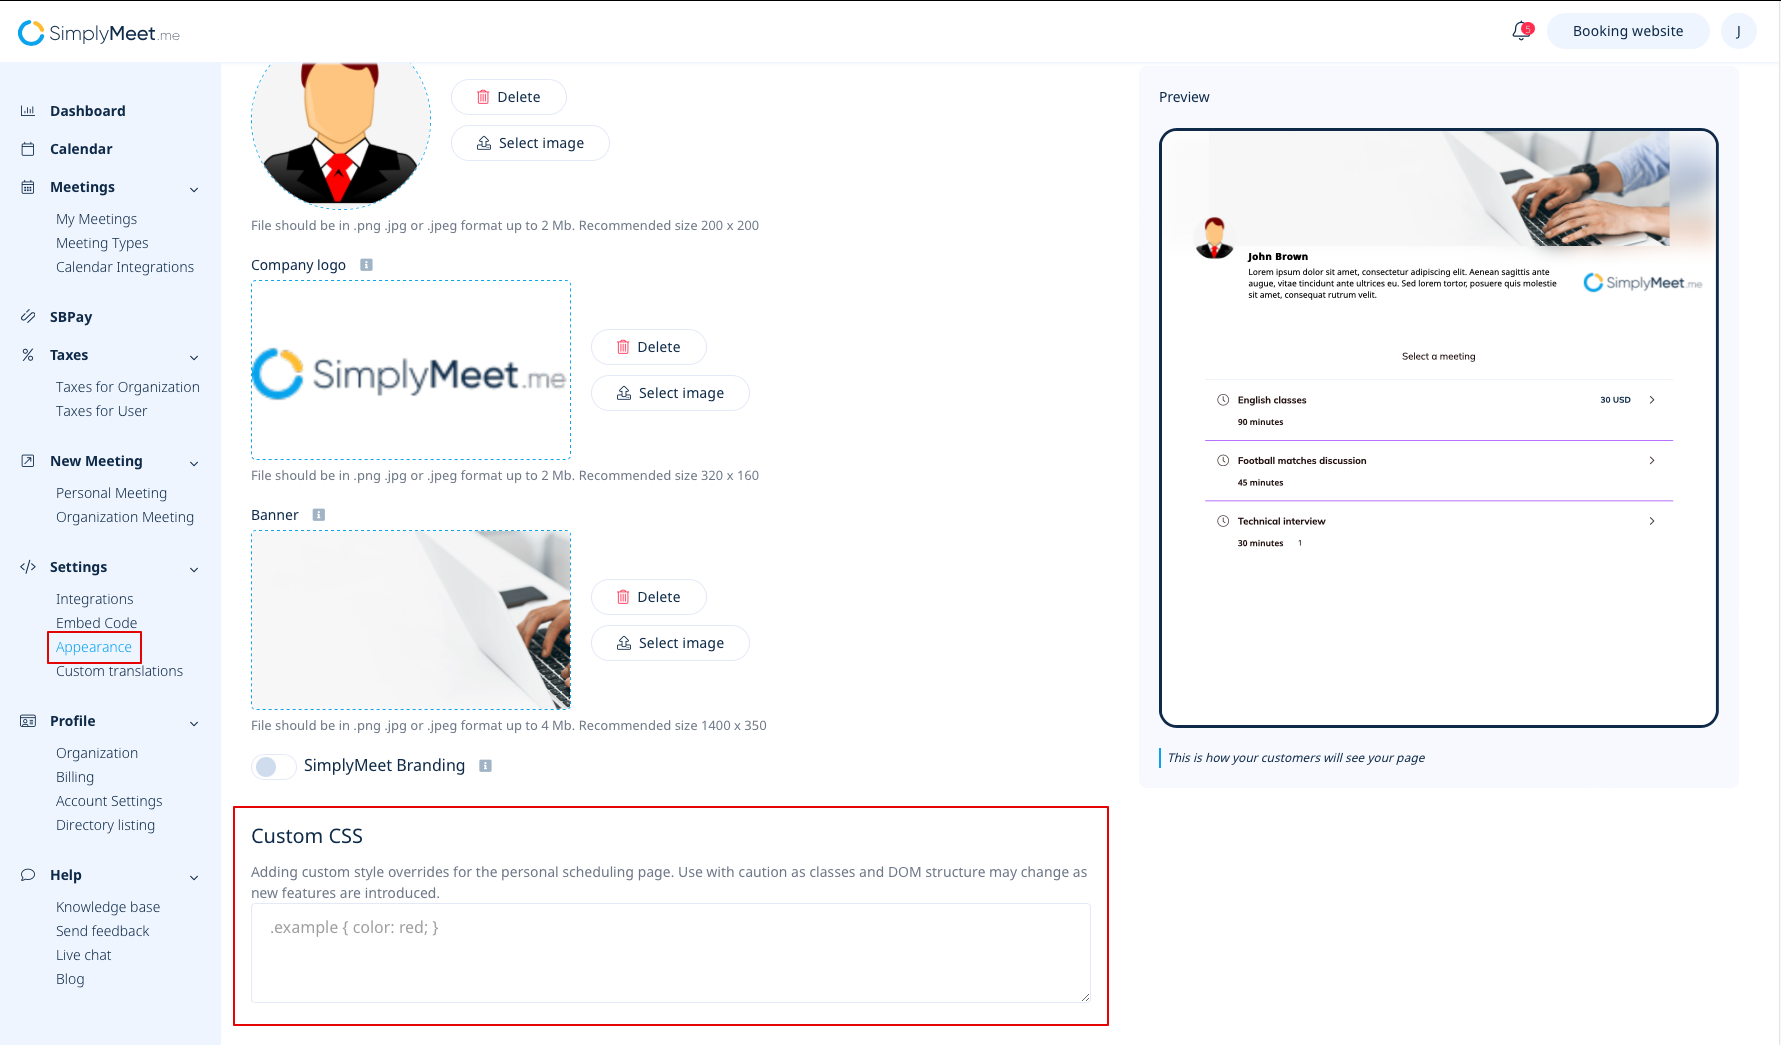
Just add your CSS using Custom CSS field. This CSS will automatically apply to your personal scheduling page.