Admin application
Admin application helps users manage their meetings more efficiently. With the centralised hub users can easily manage different types of meetings, view existing bookings, and access client details all in one place.
The application allows users to view meeting details, quickly reschedule or cancel meetings if necessary. Additionally, users can invite more participants to the meeting, which is especially useful if there are any last-minute changes.
SimplyMeet.me also offers a feature to create new meetings with pre-defined information such as the name, email, phone number, and participants.
Overall, SimplyMeet.me offers a range of features that make scheduling meetings easier and more efficient. The app is available in both the Apple Store and Play Store, making it accessible to a wide range of users.
General sections & Settings
Inside the admin app you can:
- 1. View the upcoming bookings on Dashboard
- 2. View all the booked meetings in My Meetings tab(and apply some filters if you need).
- 3. Overview, share, edit or delete the existing meeting types, and also create new ones, both personal and team(if you have paid account and the organization).
- 4. Export booked meeting and/or meeting types. View them in Saved reports
- 5. View your account data, as well as manage some preferences like language, time format, first day of the week and select between light and dark themes for the app.
- And, for sure, manage meetings notifications for the application to let you know about booked, rescheduled or cancelled meetings, remind about the cancelled ones or notify about the new posts in our blog.
- 6. As well you can easily access help centre, contact support, view our privacy policy, terms and conditions and data processing agreement.
- And go to our socials with loads of useful content.

Dashboard and Booked Meetings overview
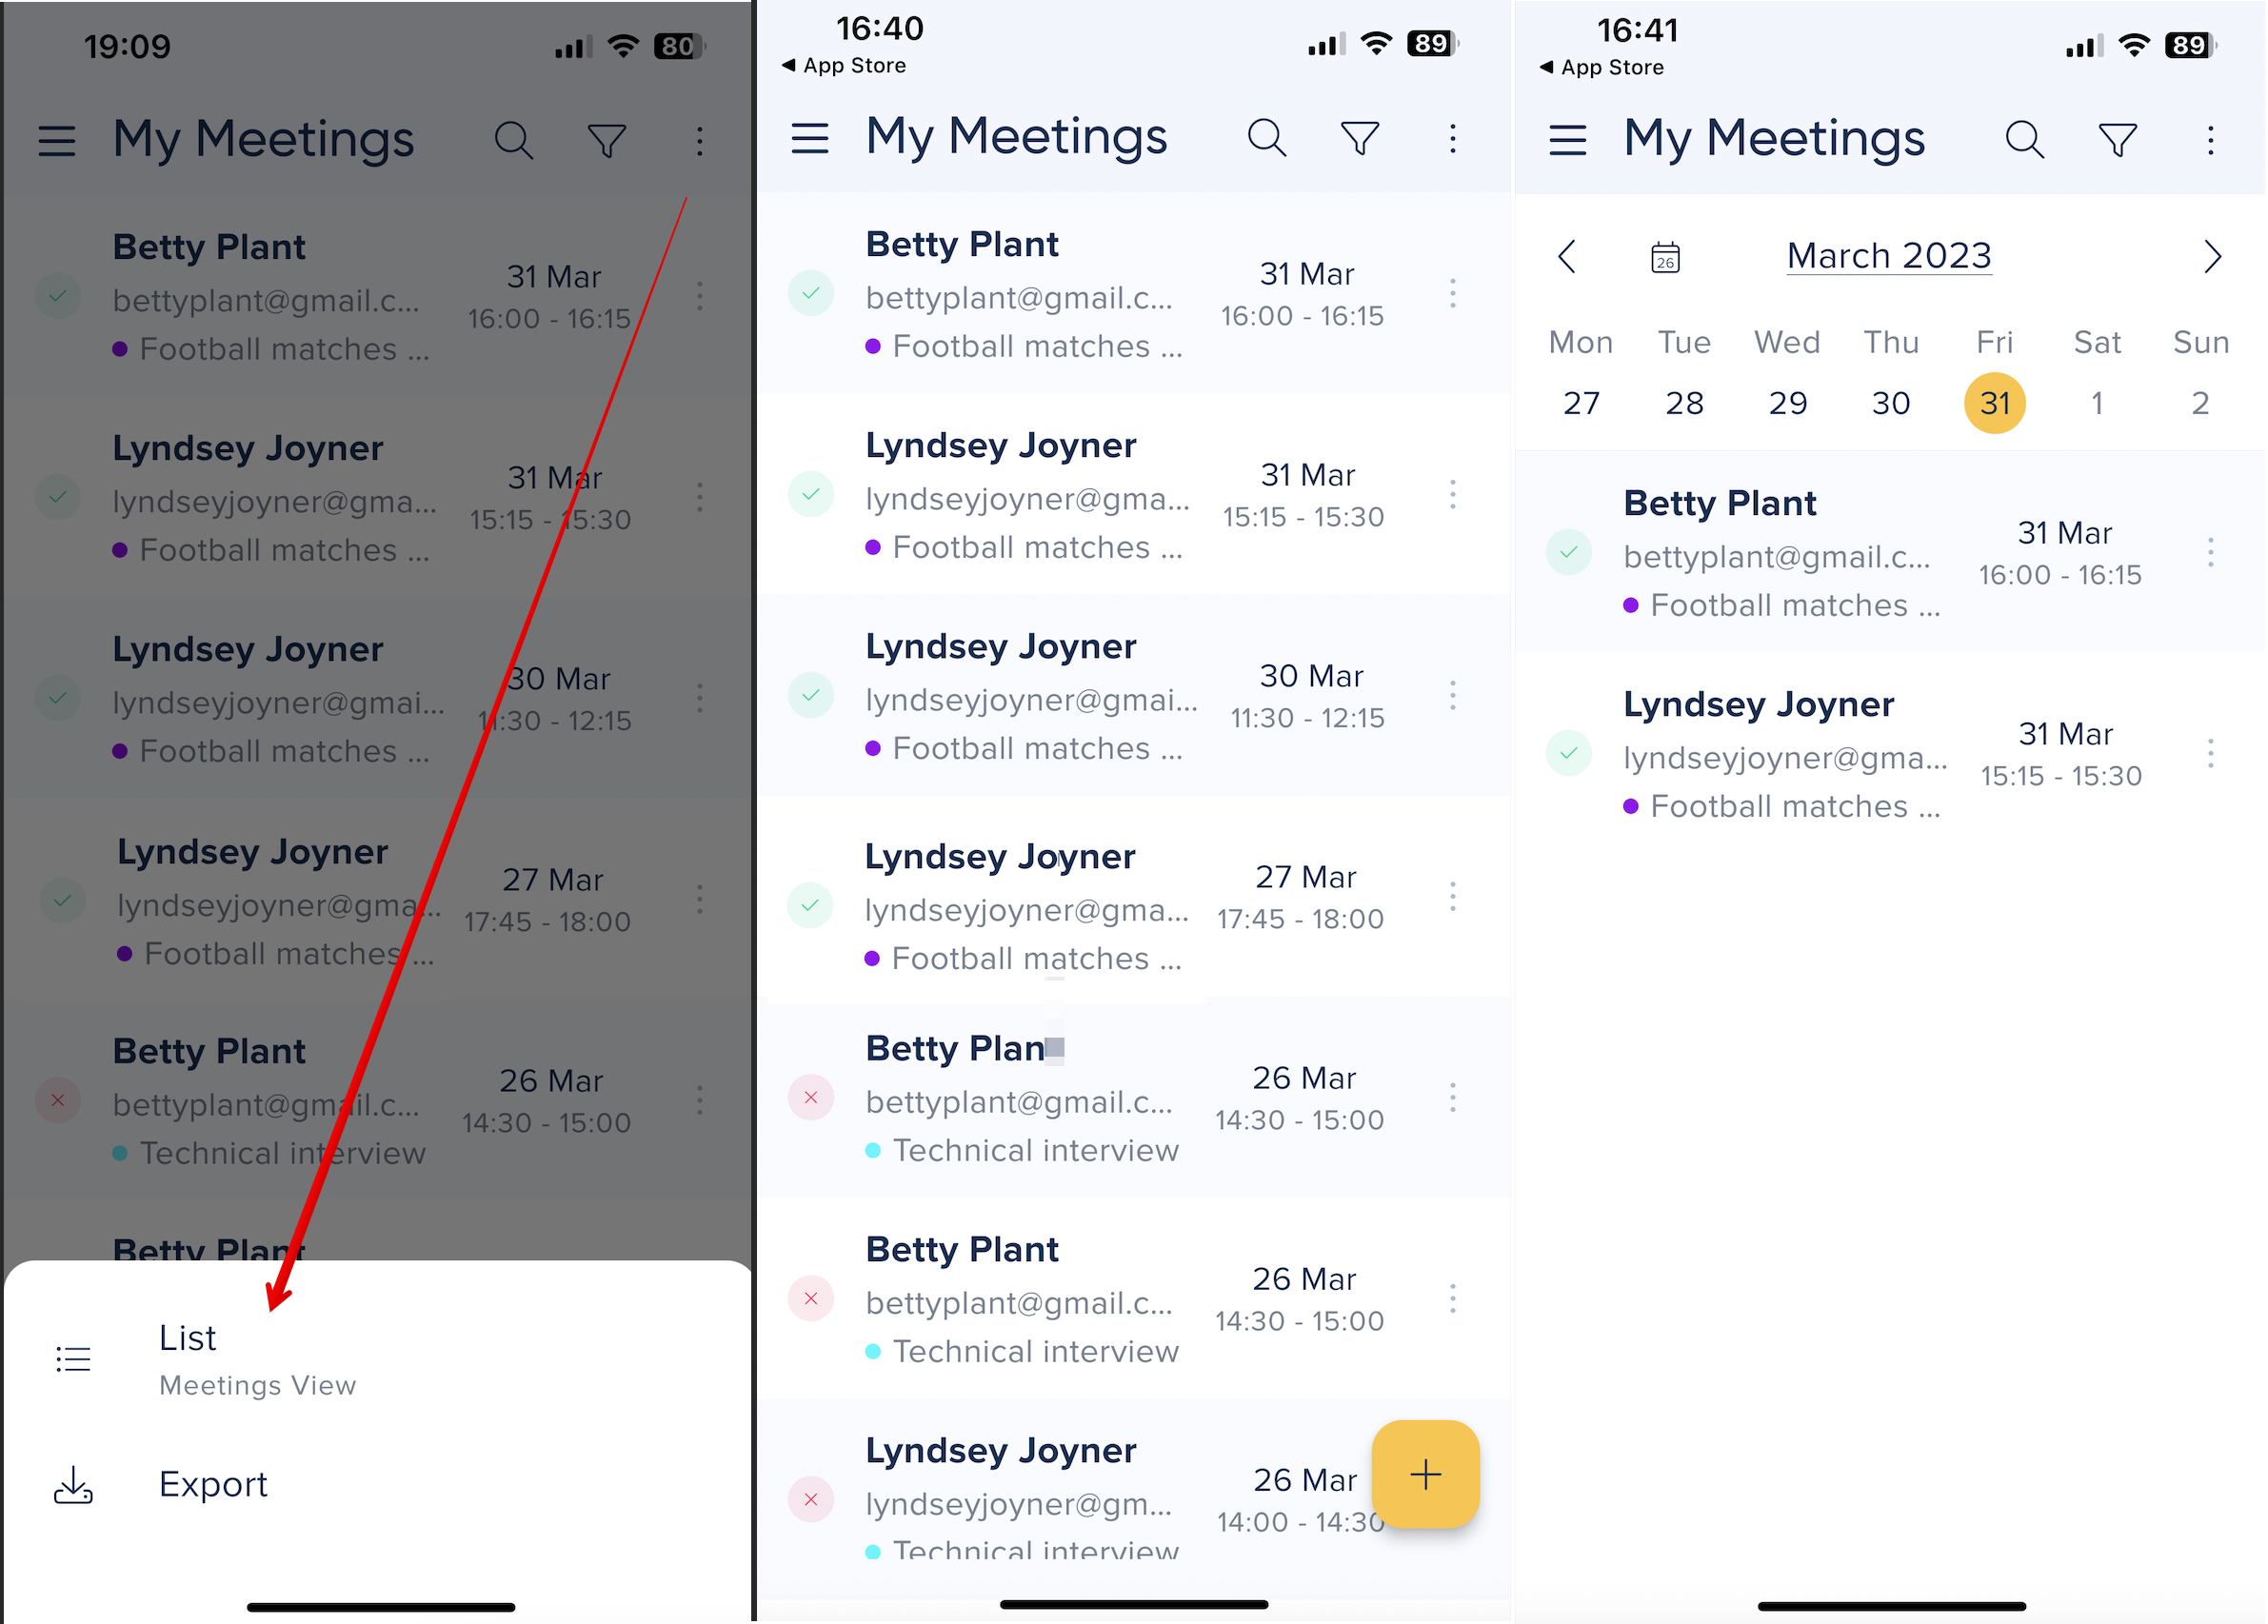
- 1. On both Dashboard and My meetings tabs you can view the booked meetings details: their dates and times, client name and contact details, click on client phone to contact him/her via call, SMS or popular messengers, view and/or invite additional participants, reschedule meetings, add necessary notes or save the client details to your device contacts.
- And for sure cancel and delete meetings if necessary.

- 2. Now you can also select between "List" and "Agenda" views on My meetings page depending on what's more convenient for you.
- Just select the preferable option from the three dots menu on the top right.
Booking a New Meeting
- 1. You can follow the usual flow and book a new meeting from the New meeting tab by simply clicking on the desired meeting type, selecting the date and time, filling in the details set for this meeting type and confirm.
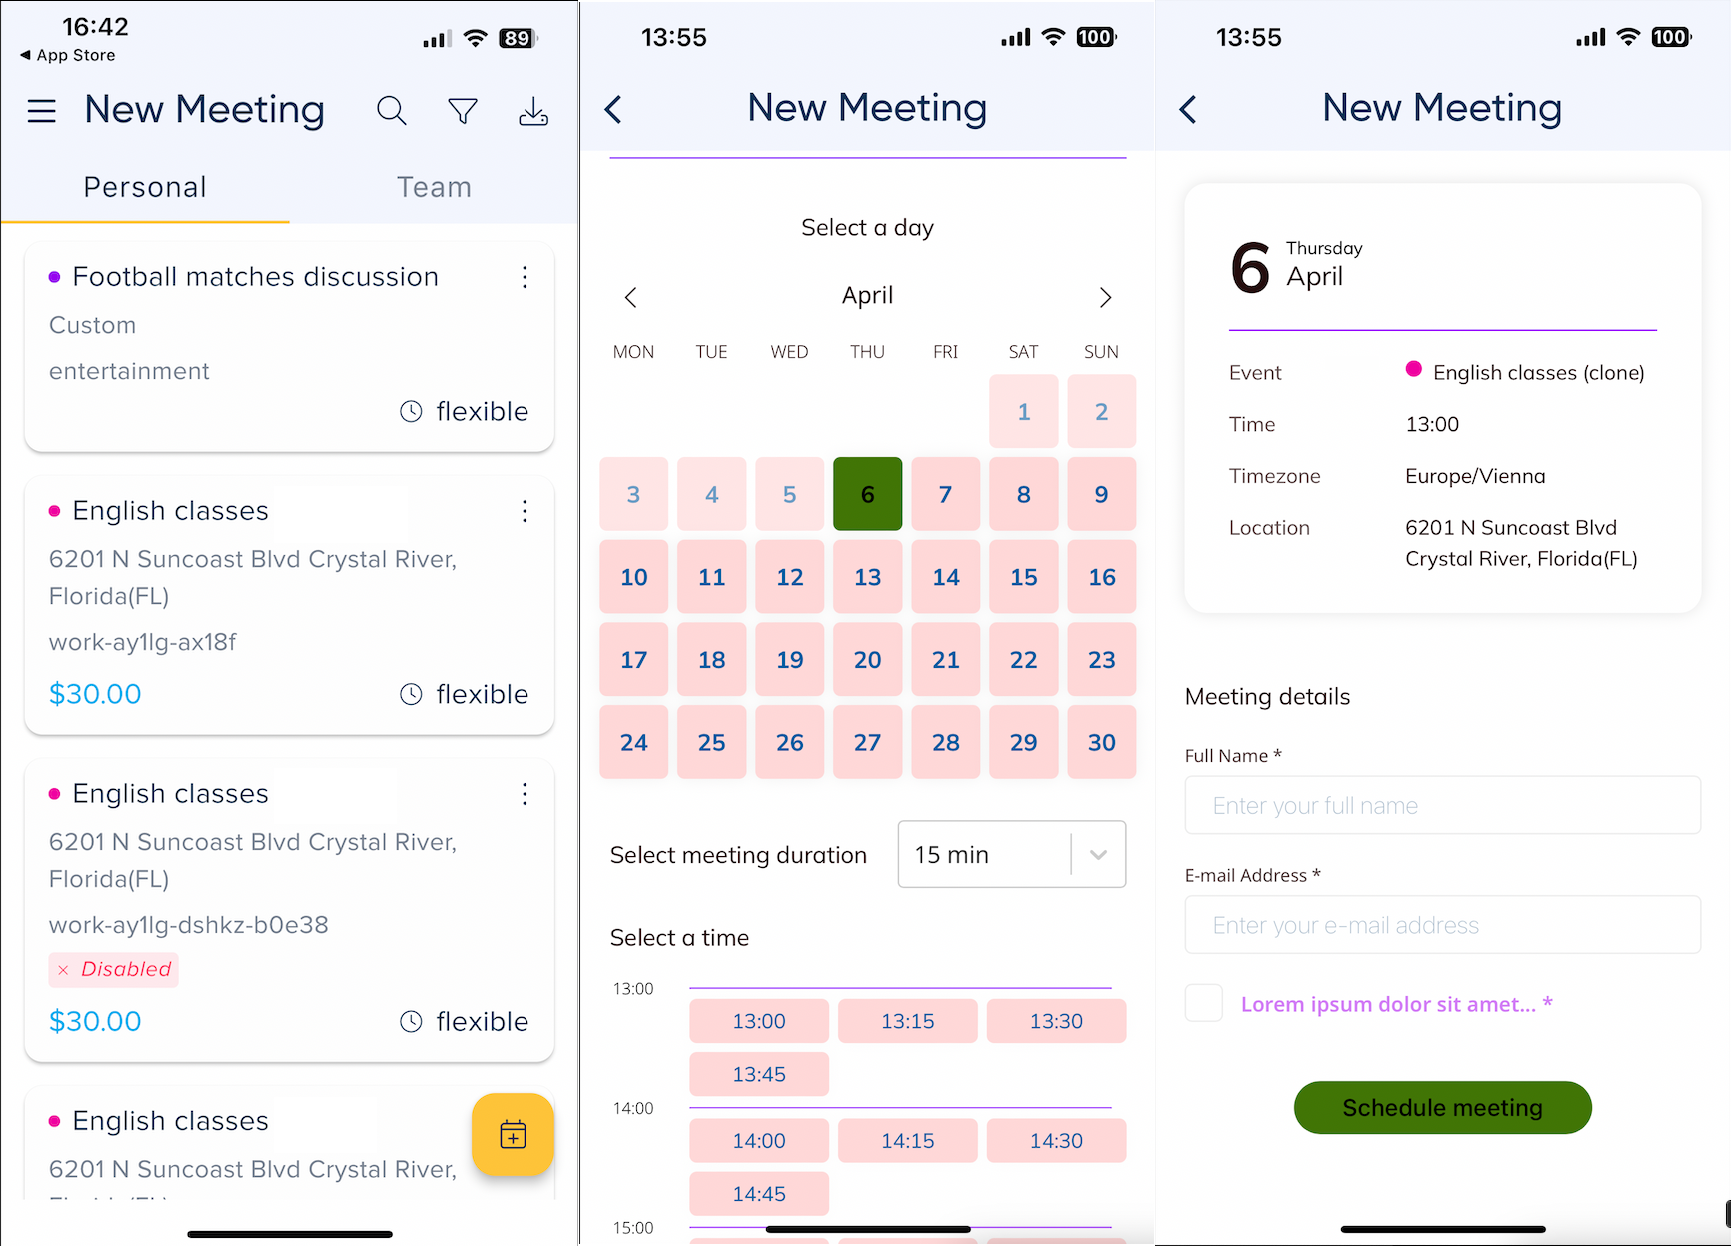
- 2. Or you can use the new option "Meeting from meeting" and create a meeting with the already pre-filled details taken from the selected booking.
- The system will suggest the same meeting type if it is active or you can also choose any other if you need.
- Depending on the meeting type settings the system will pre-fill the client details and additional participants emails so you will just need to check and confirm the meeting.

Sharing Timeslots
There are three ways you can share meeting type timeslots using the app.
In the New meeting tab click on three dots near the desired meeting type and select the option from the following:
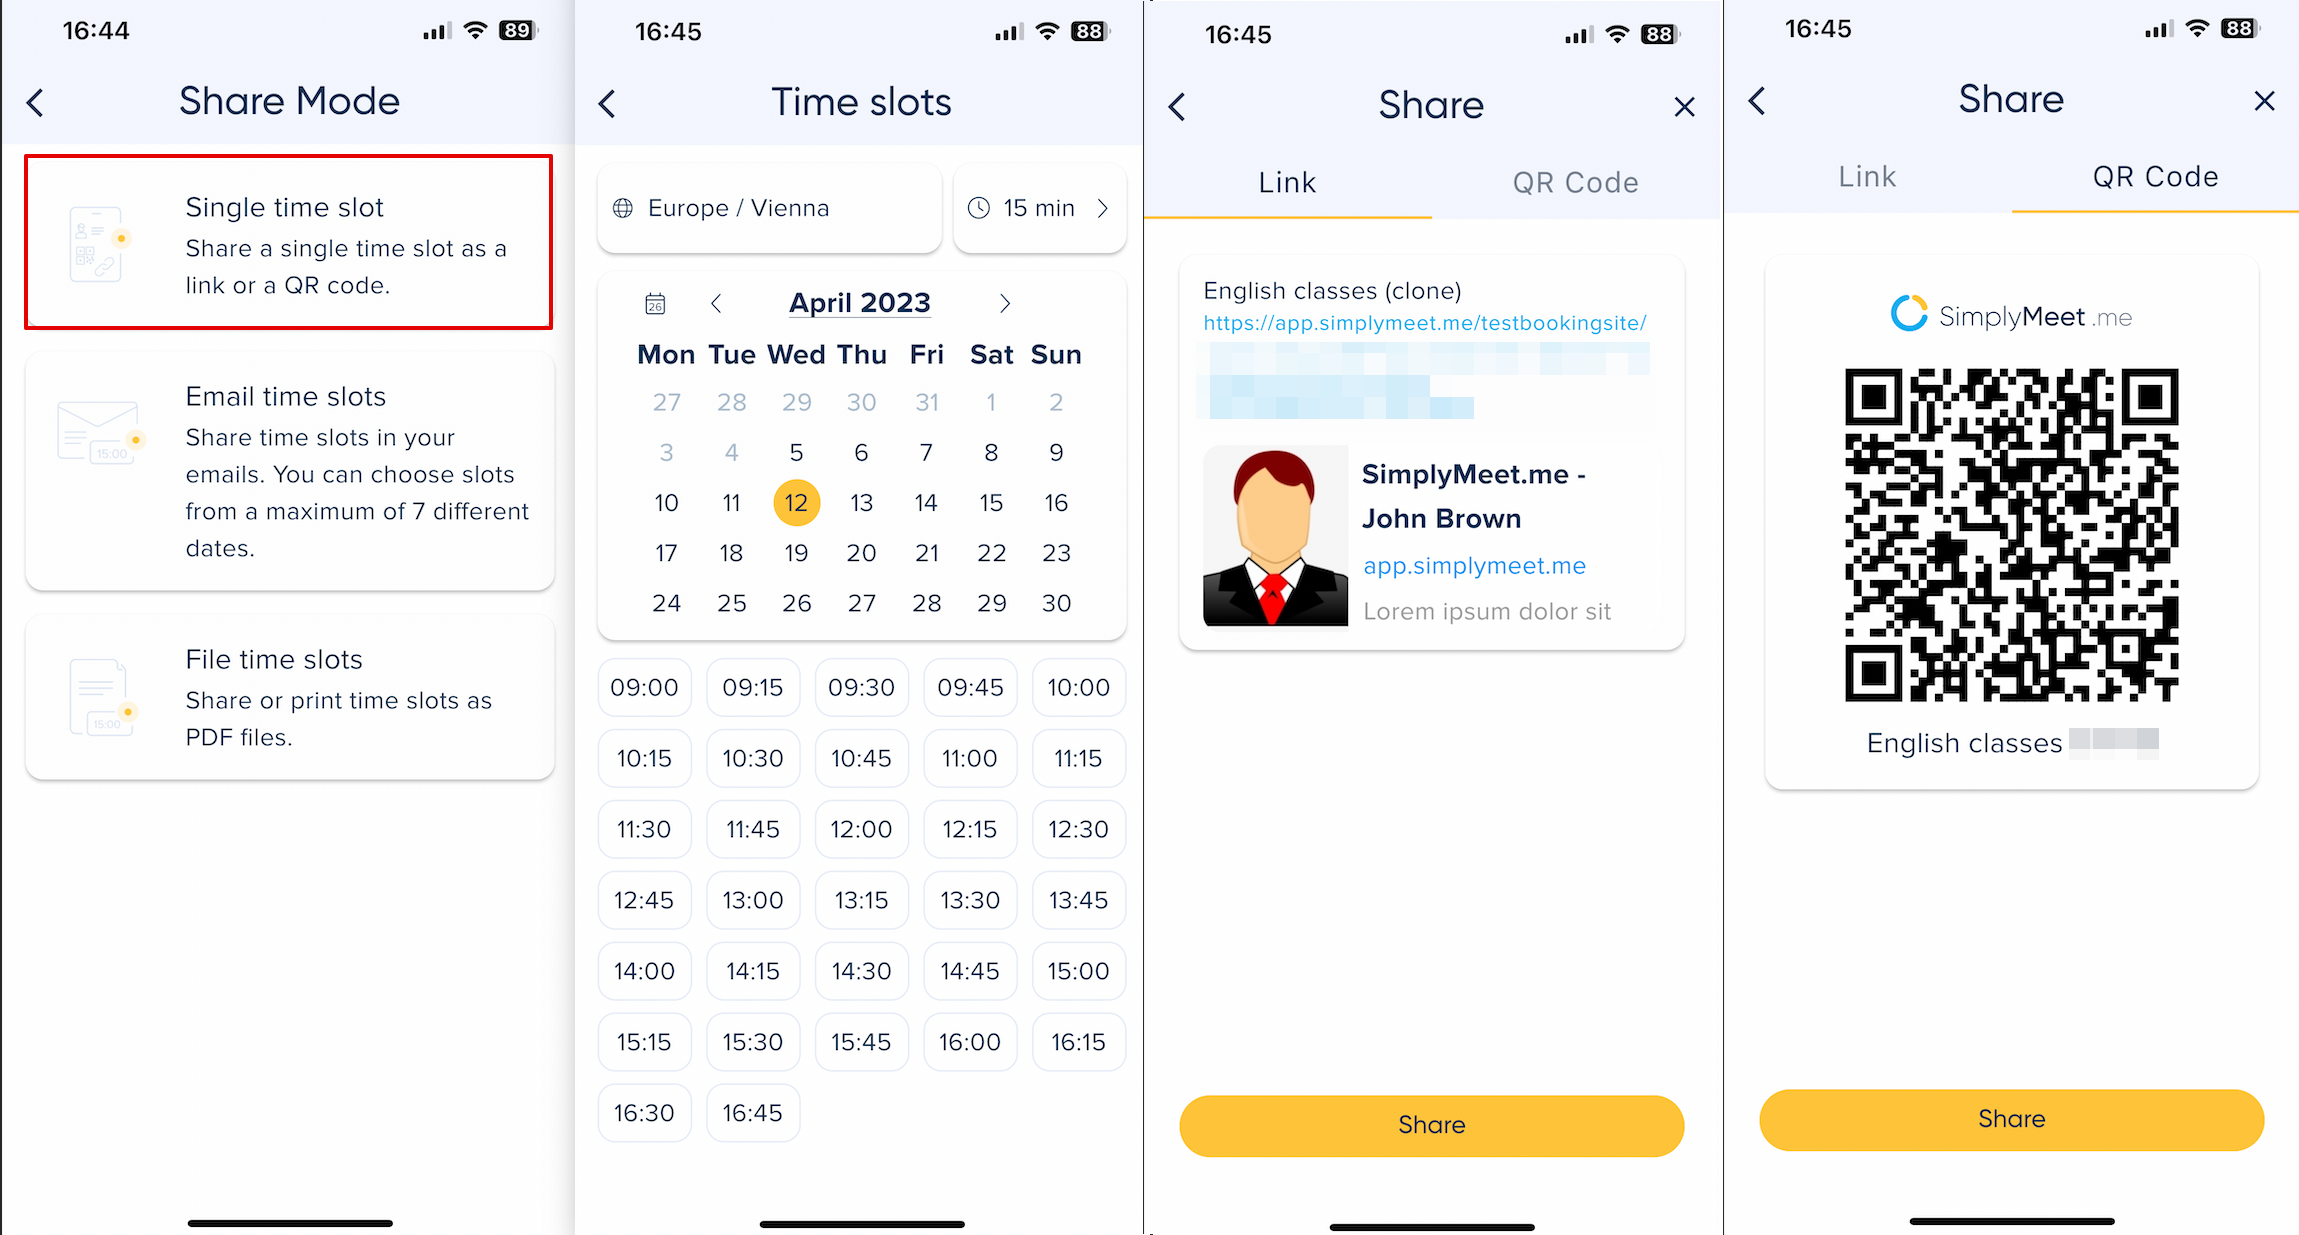
- 1. Single timeslot.
- Choose the desired date and time.
- Copy the link or share the QR code.
- Choose the desired date and time.
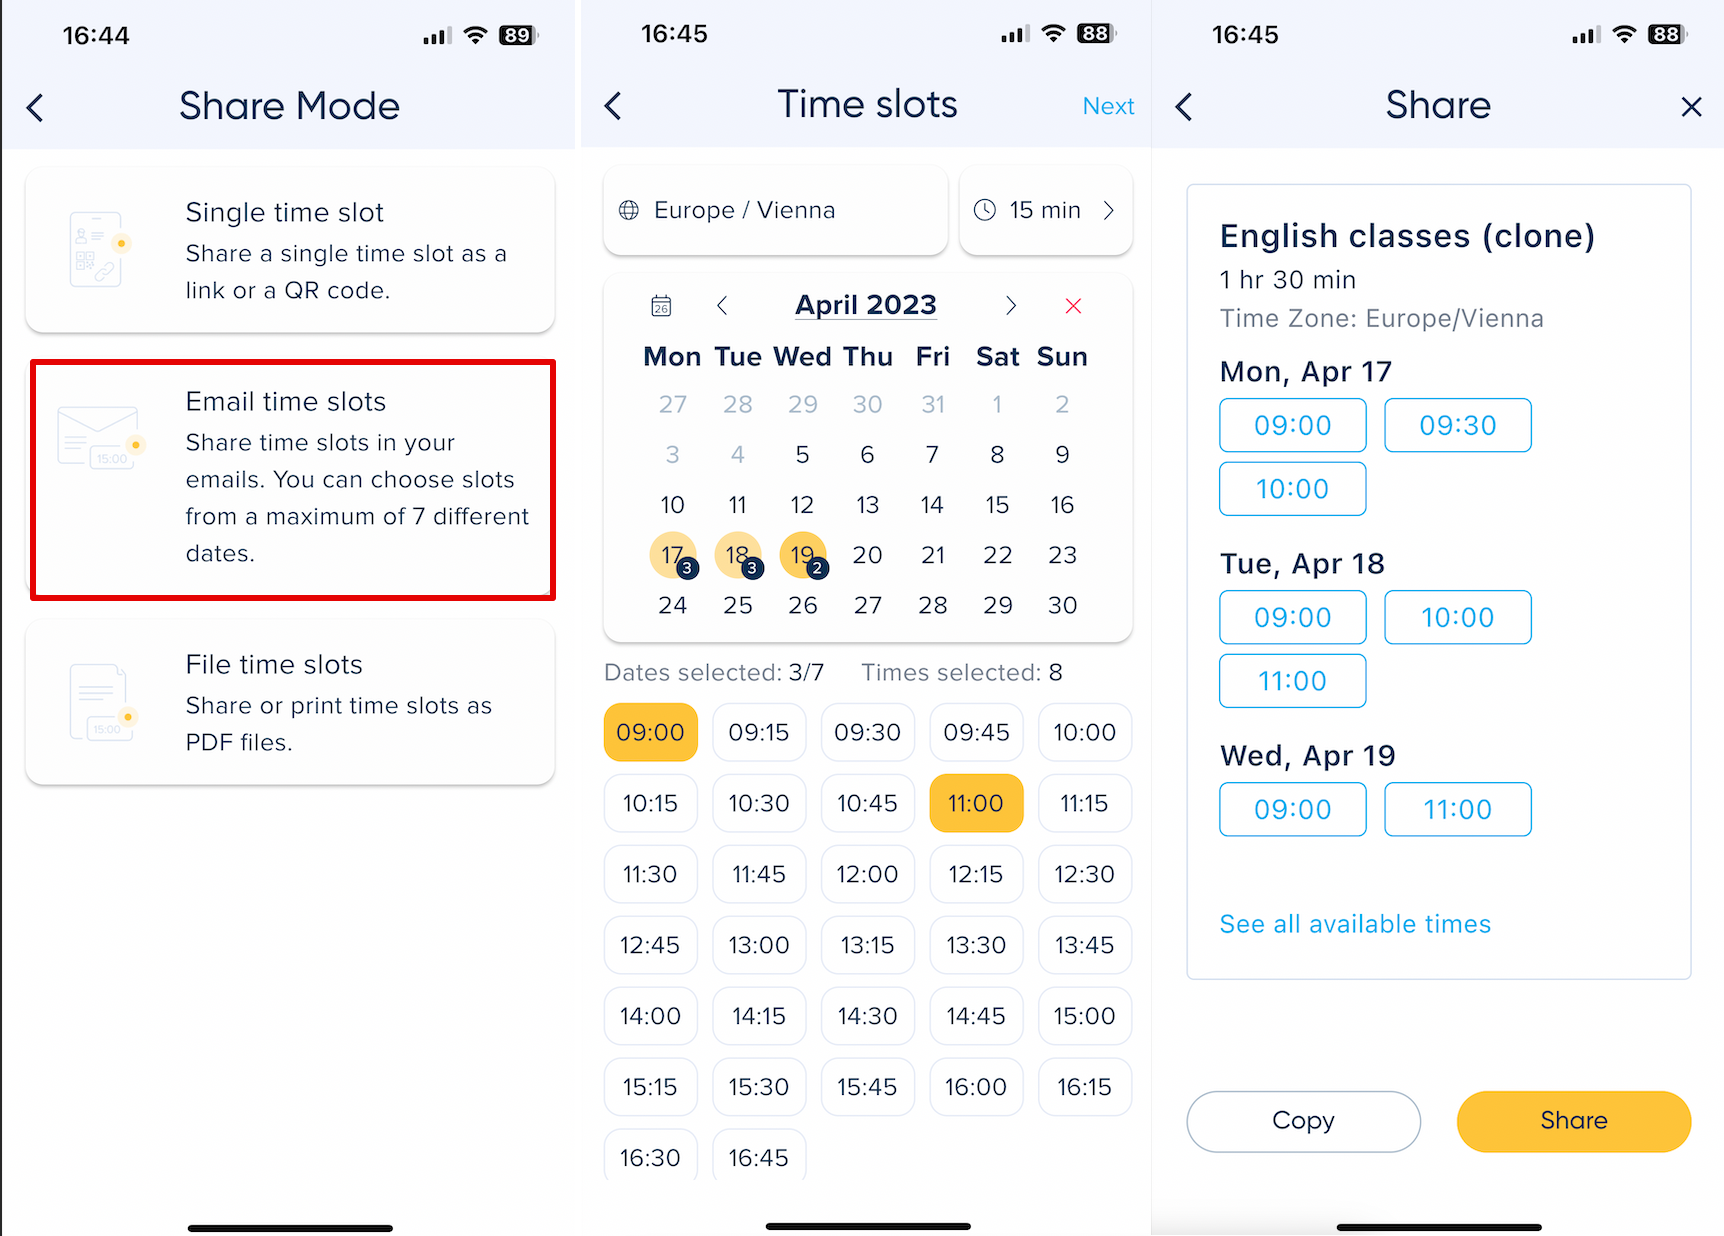
- 2. Send a set of timeslots via email.
- Here you can choose to send the timeslots from 1 to 7 dates.
- Simply click on the date and then on the desired times(repeat for some more dates if necessary)
- Proceed to the next step with the preview of the selections.
- Click on "Share" to add the slots to email.
- Here you can choose to send the timeslots from 1 to 7 dates.
- (on IOS) The mailing app will automatically be open and the times will be automatically pasted there so you will just need to add the recipient(s) and some desired email content.
- (on Android) The timeslots will be copied to the clipboard so you will be able to open the mailing app manually and paste the times selected for sharing to the email body.
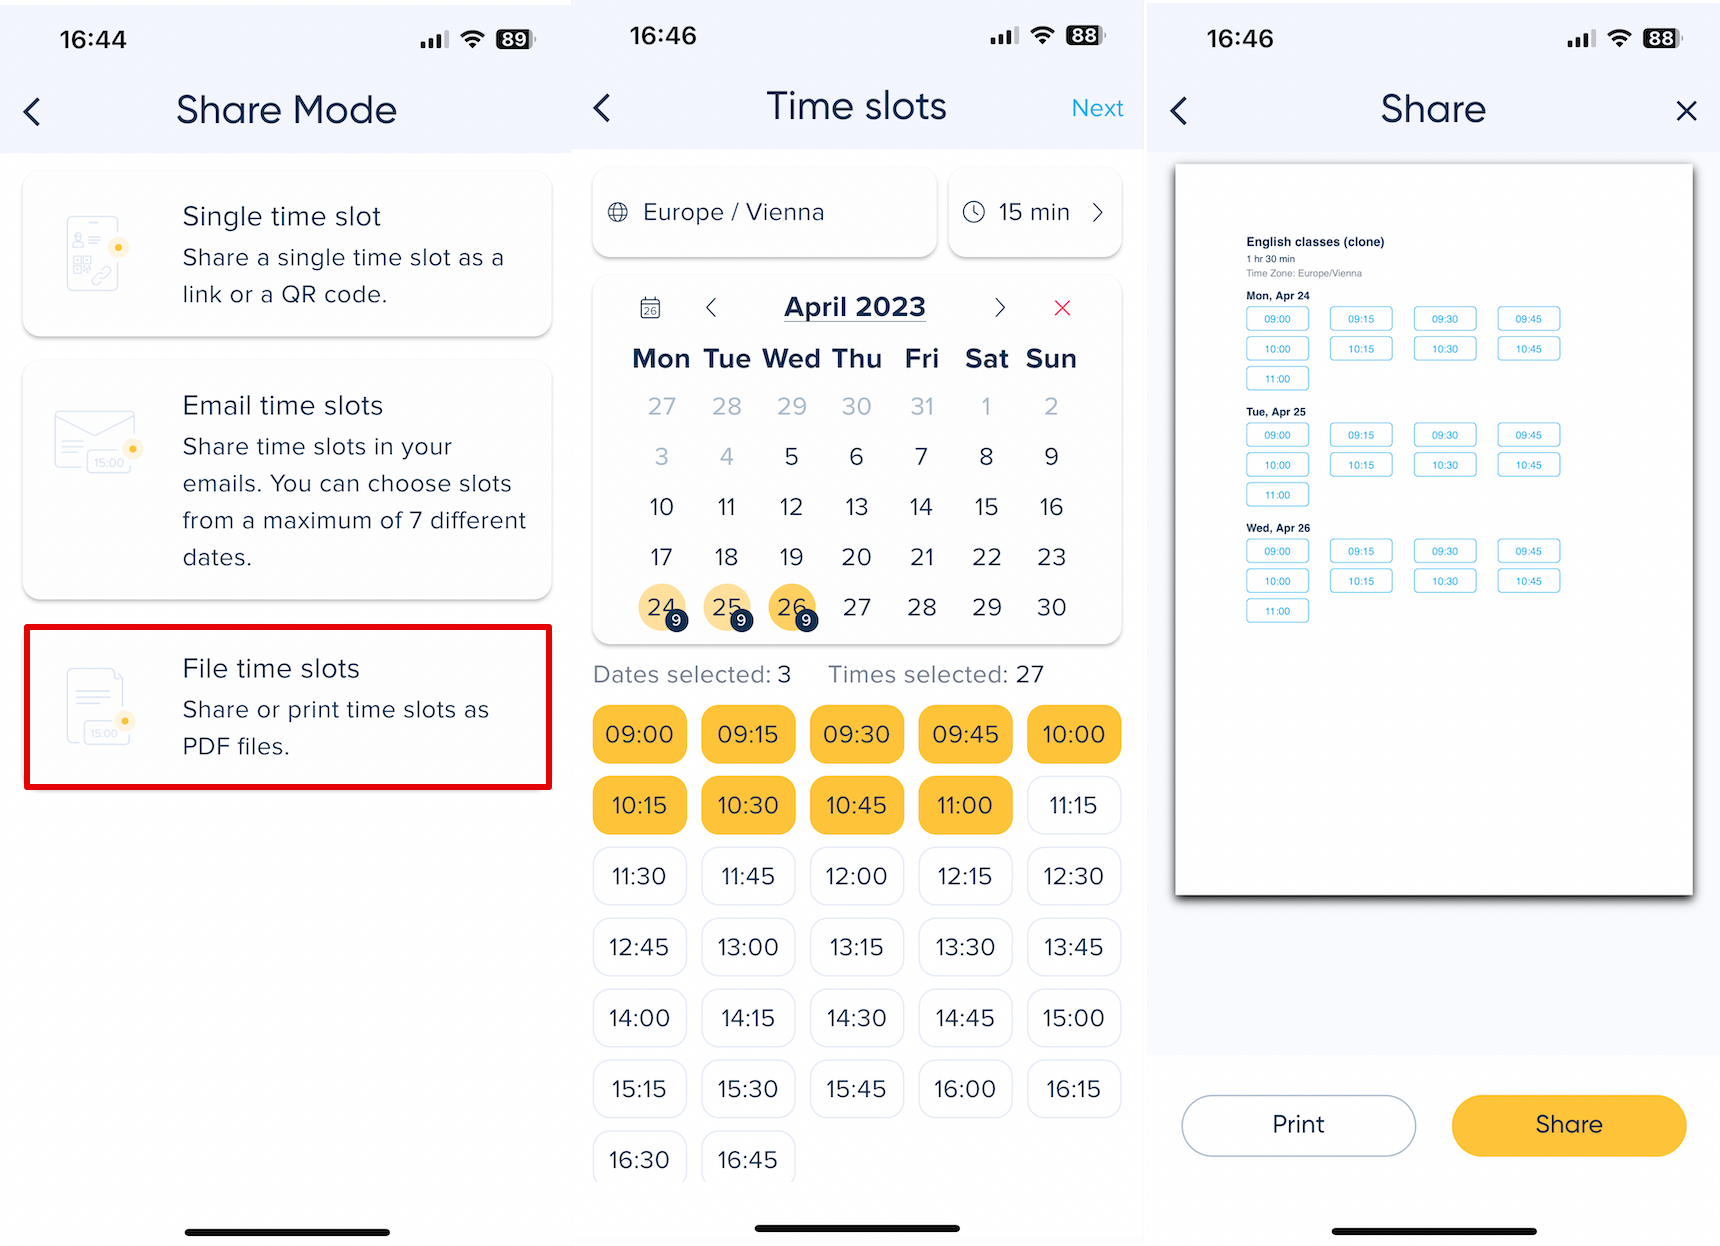
- 3. File timeslots.
- Simply choose the date and all the timeslots you need (repeat for more dates if you need to).
- Proceed to preview and share to save it as a file or send to printer.
More features to come!