Getting Started with SimplyMeet.me
Follow these simple steps and you’ll get your SimplyMeet.me account up and running in no time.
Video ![]()
Option 1. Use onboarding tour
After you create an account you will be guided through the onboarding steps to show the main settings. It will also allow you to have a bookable meeting type ready just in a few minutes.
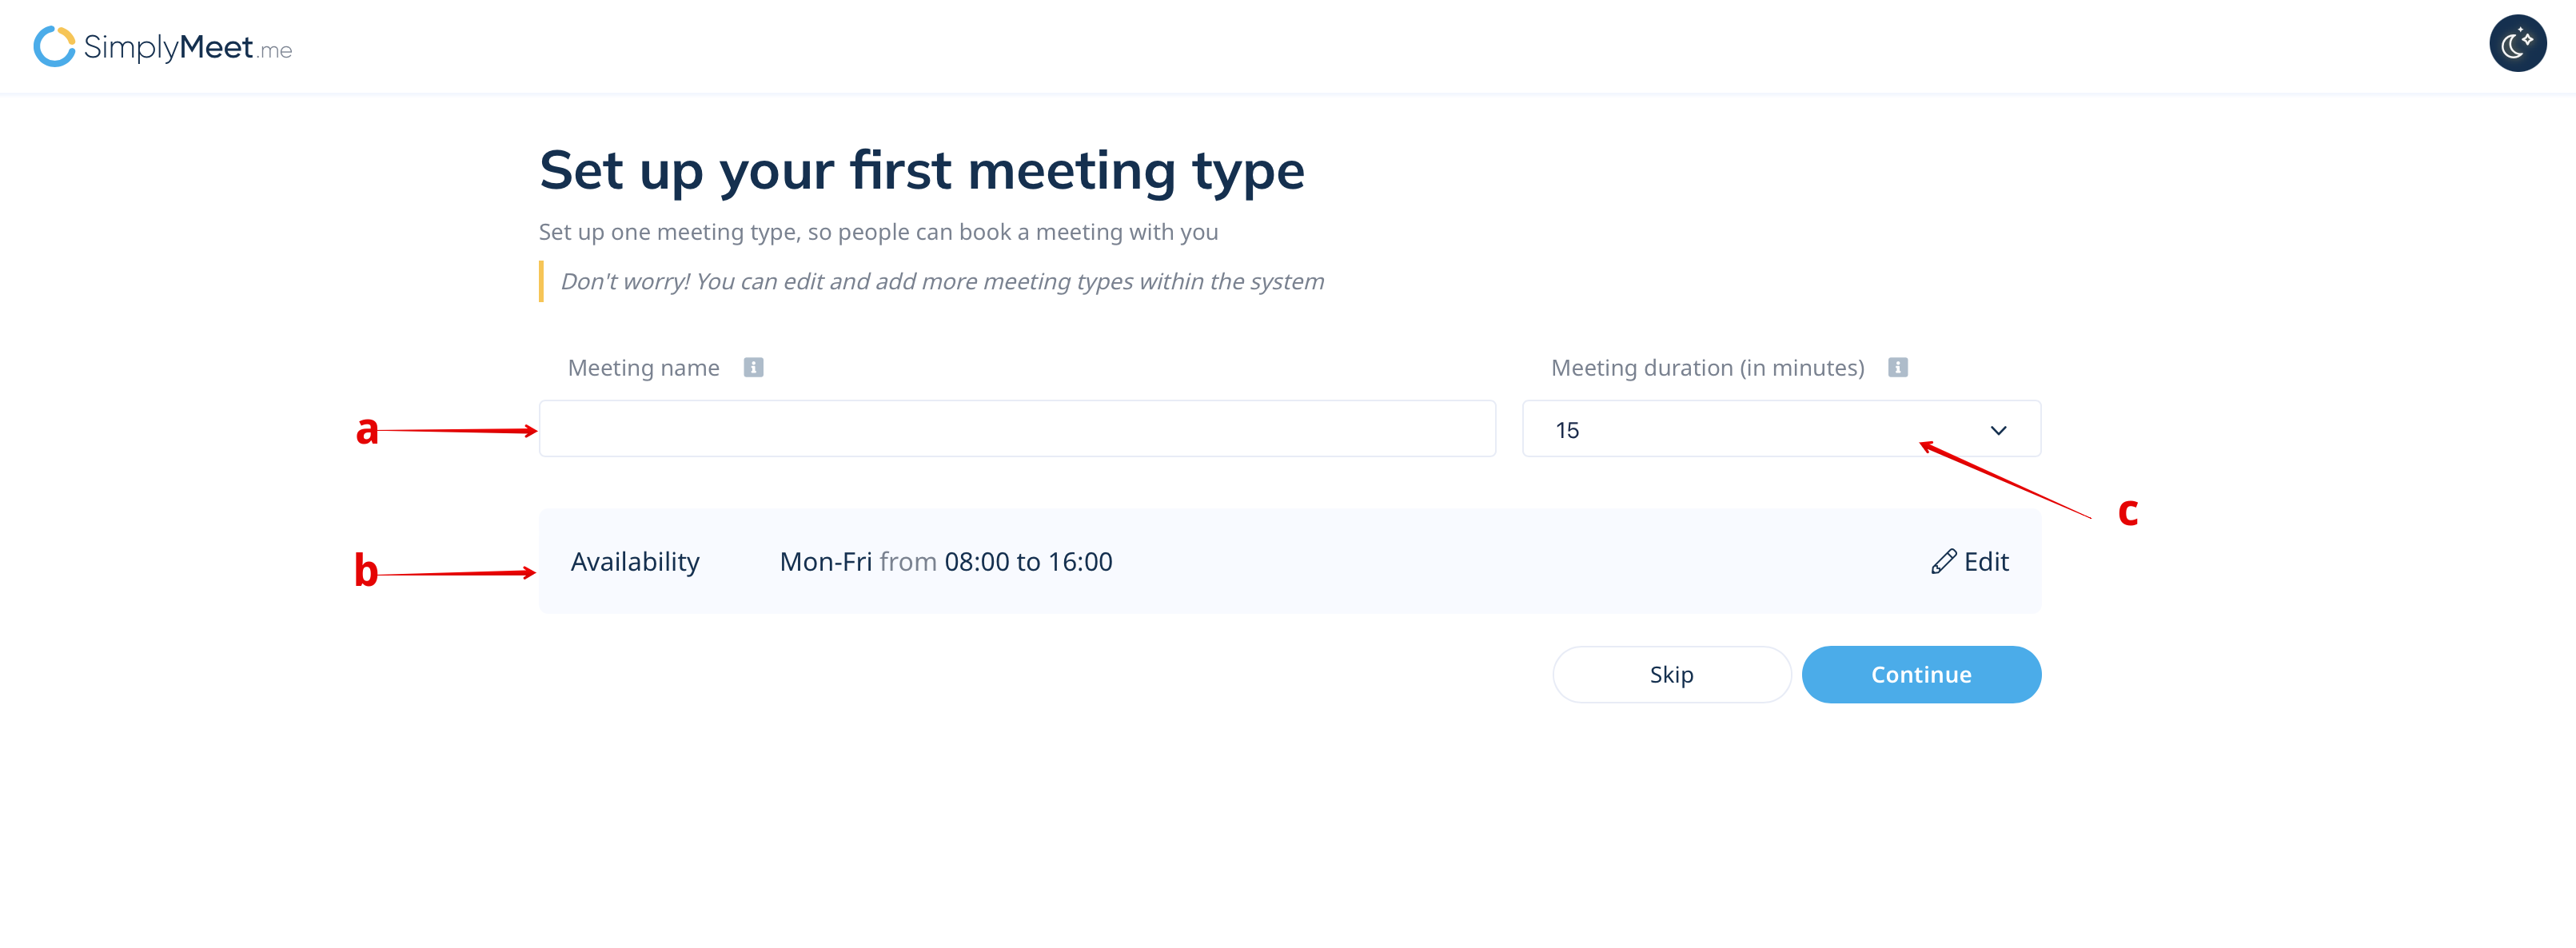
1. The first step suggests to create your first meeting type. You can add a) its name; b) adjust availability and c) duration.
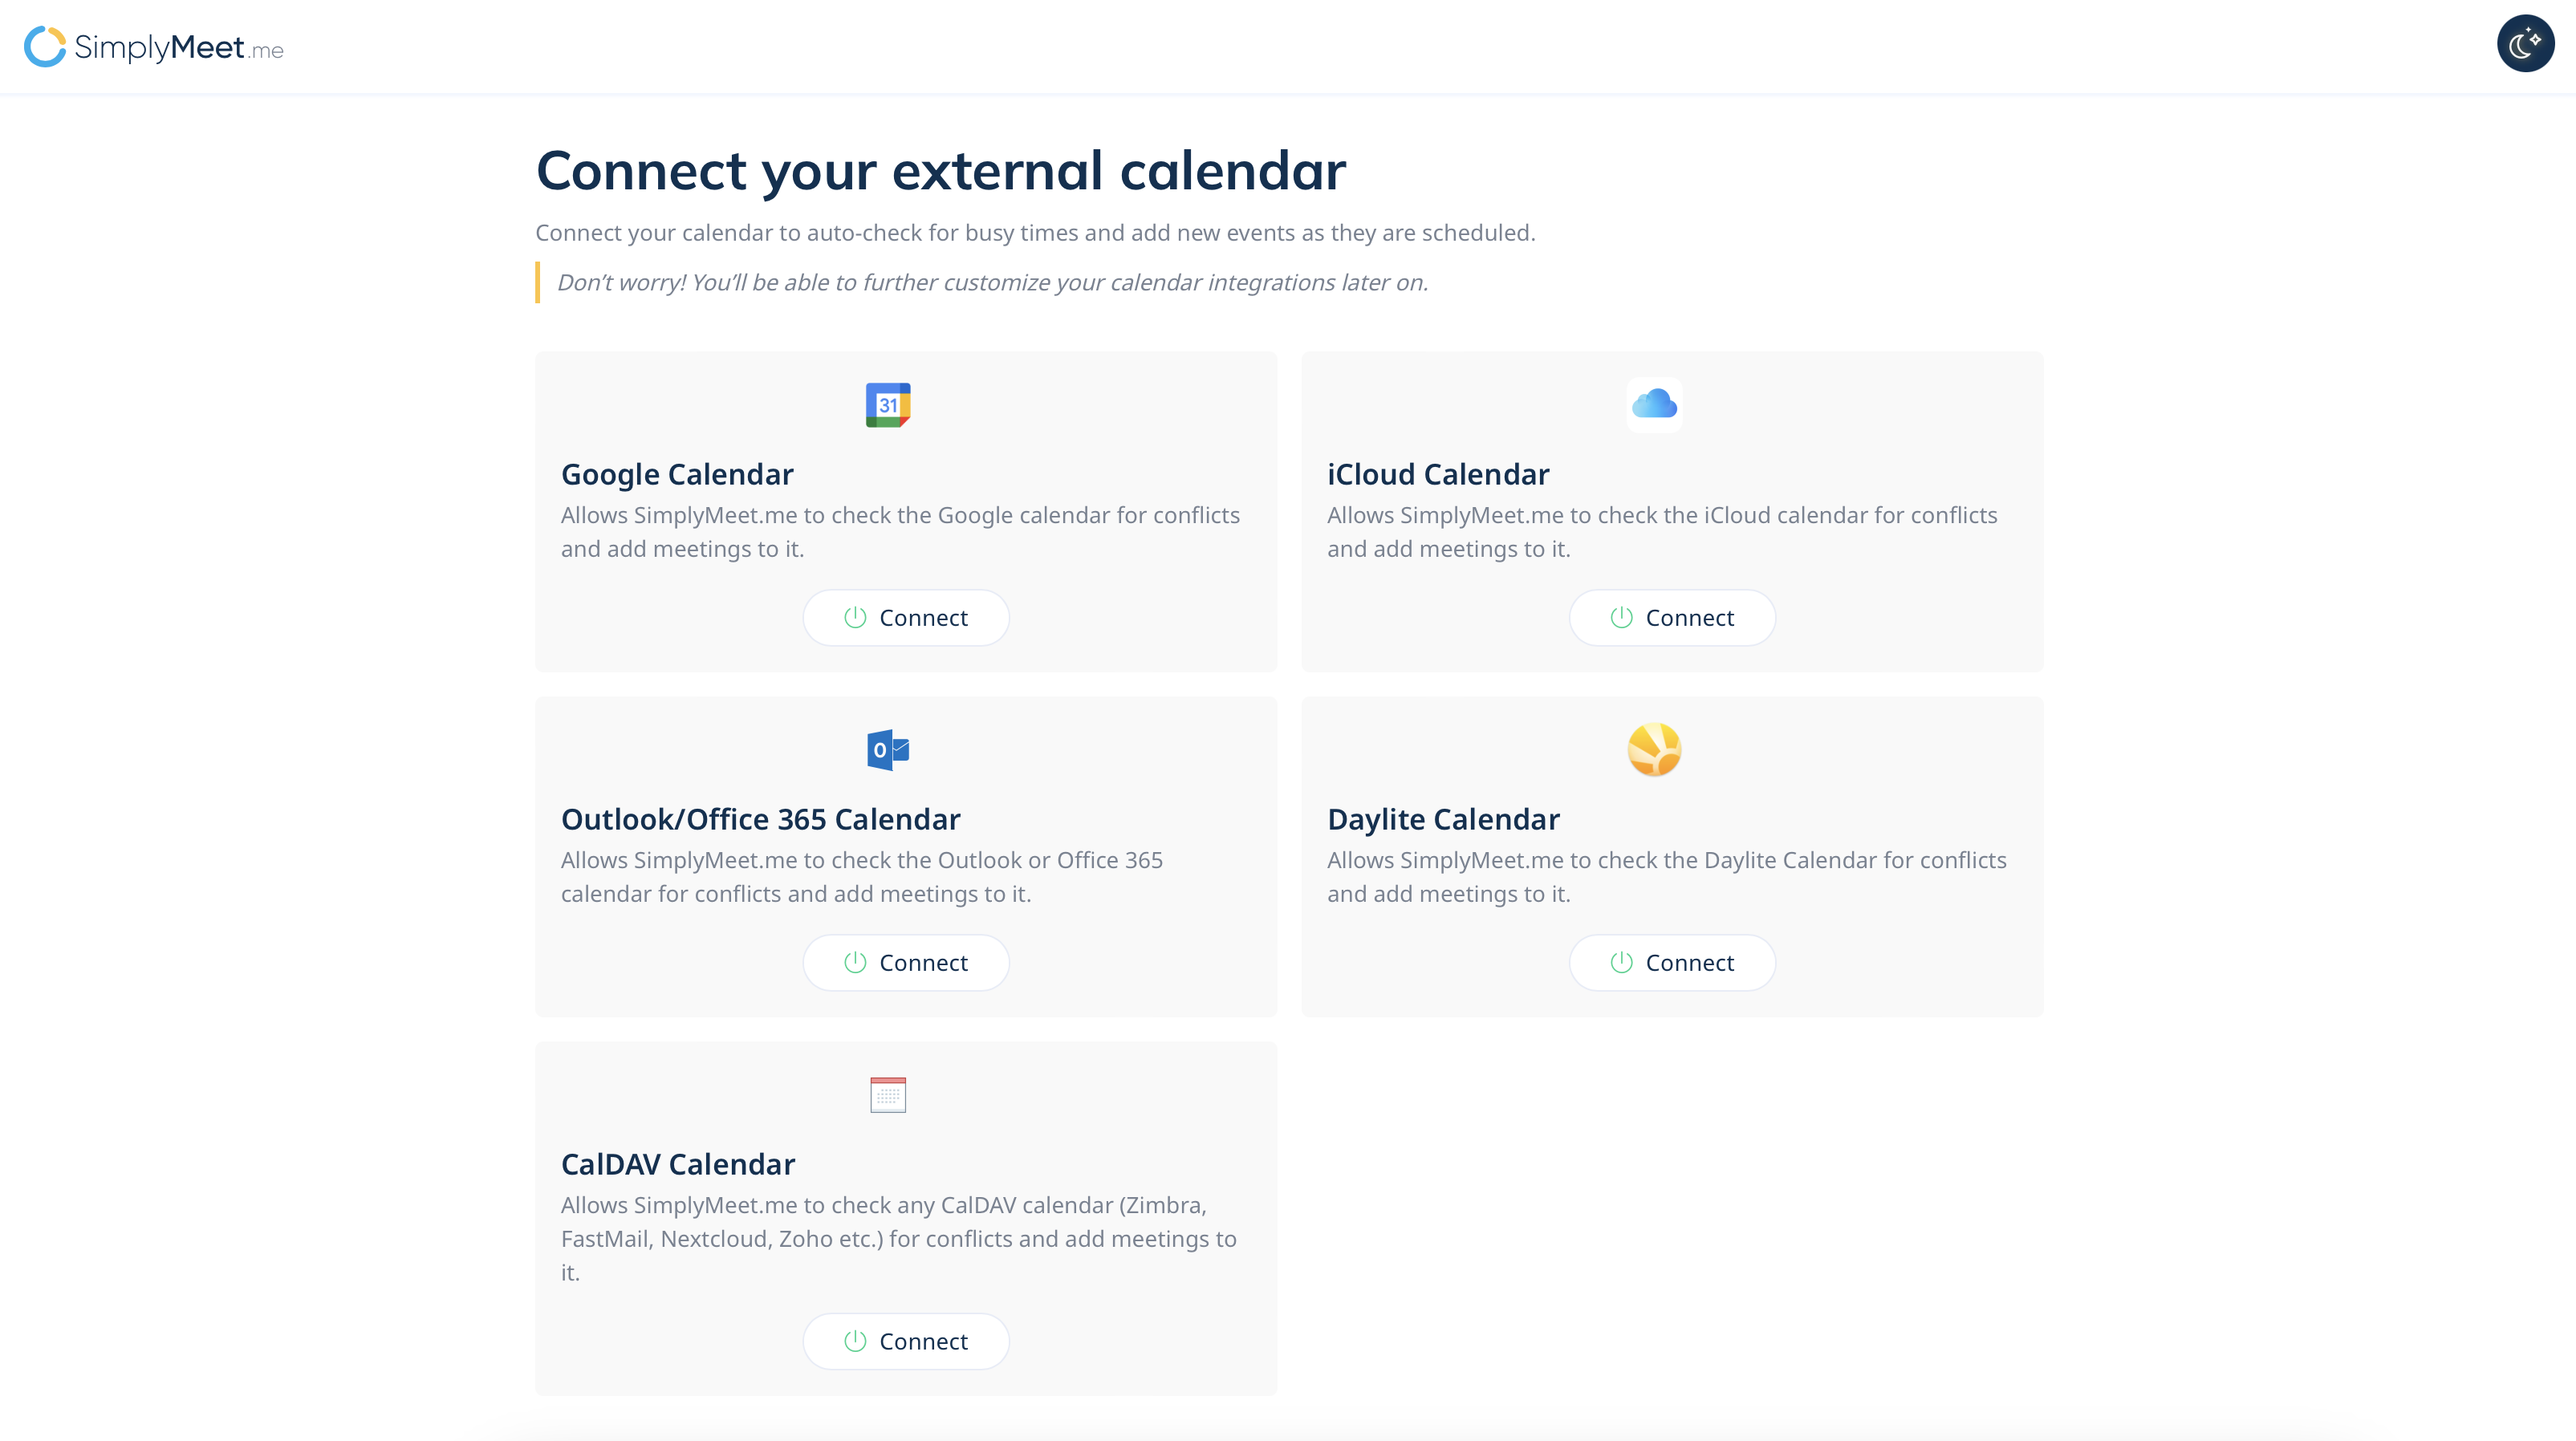
2. On the next step you can connect your calendar that will be used to sync the availability and booked meetings with.
It is also possible to skip this step and use internal SimplyMeet.me calendar only.
(you will be able to add more adjustments later if needed)
Option 2. Adding settings if the onboarding was skipped
Step 1. Connect your online Calendar
First things first, let’s get your online calendar connected to SimplyMeet.me so the booked meetings can be added there and so you're never double booked.
You can connect the following calendars (up to 3 at once):
- Outlook/Office 365
- iCloud
- Zoho Calendar
- FastMail
- NextCloud
- Zimbra
- Daylite
- Mailo
- And any CalDAV compatible calendar.
Let's connect the calendar account:
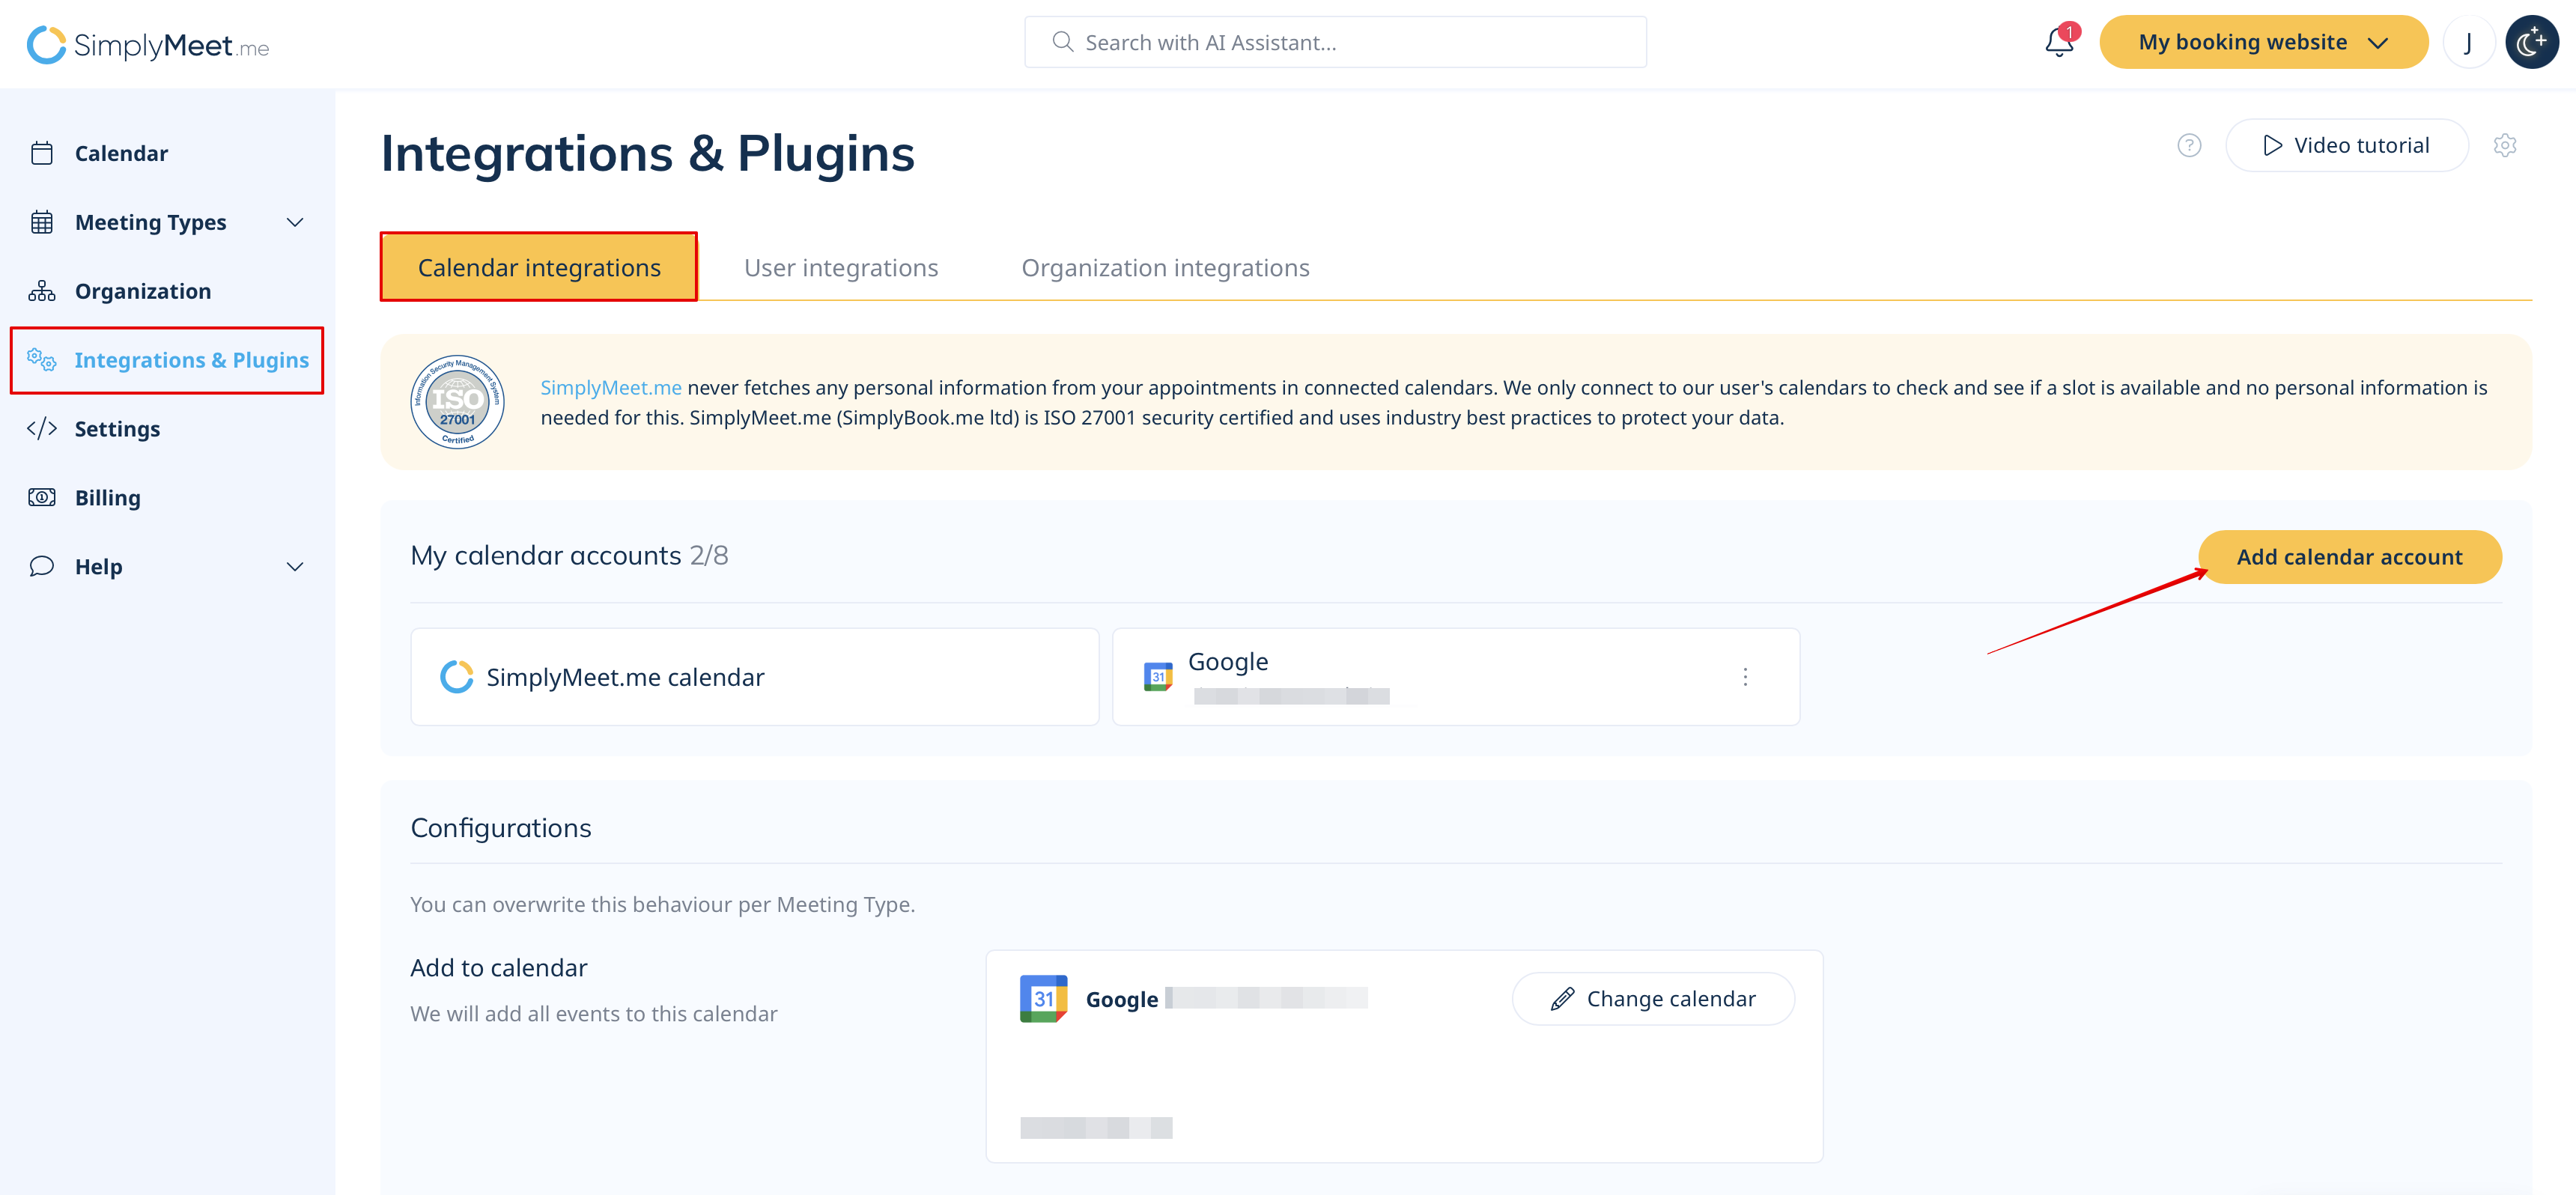
- Go to Calendar Integration page.
- Click on Add calendar account button and choose your Calendar type or CalDAV connection.
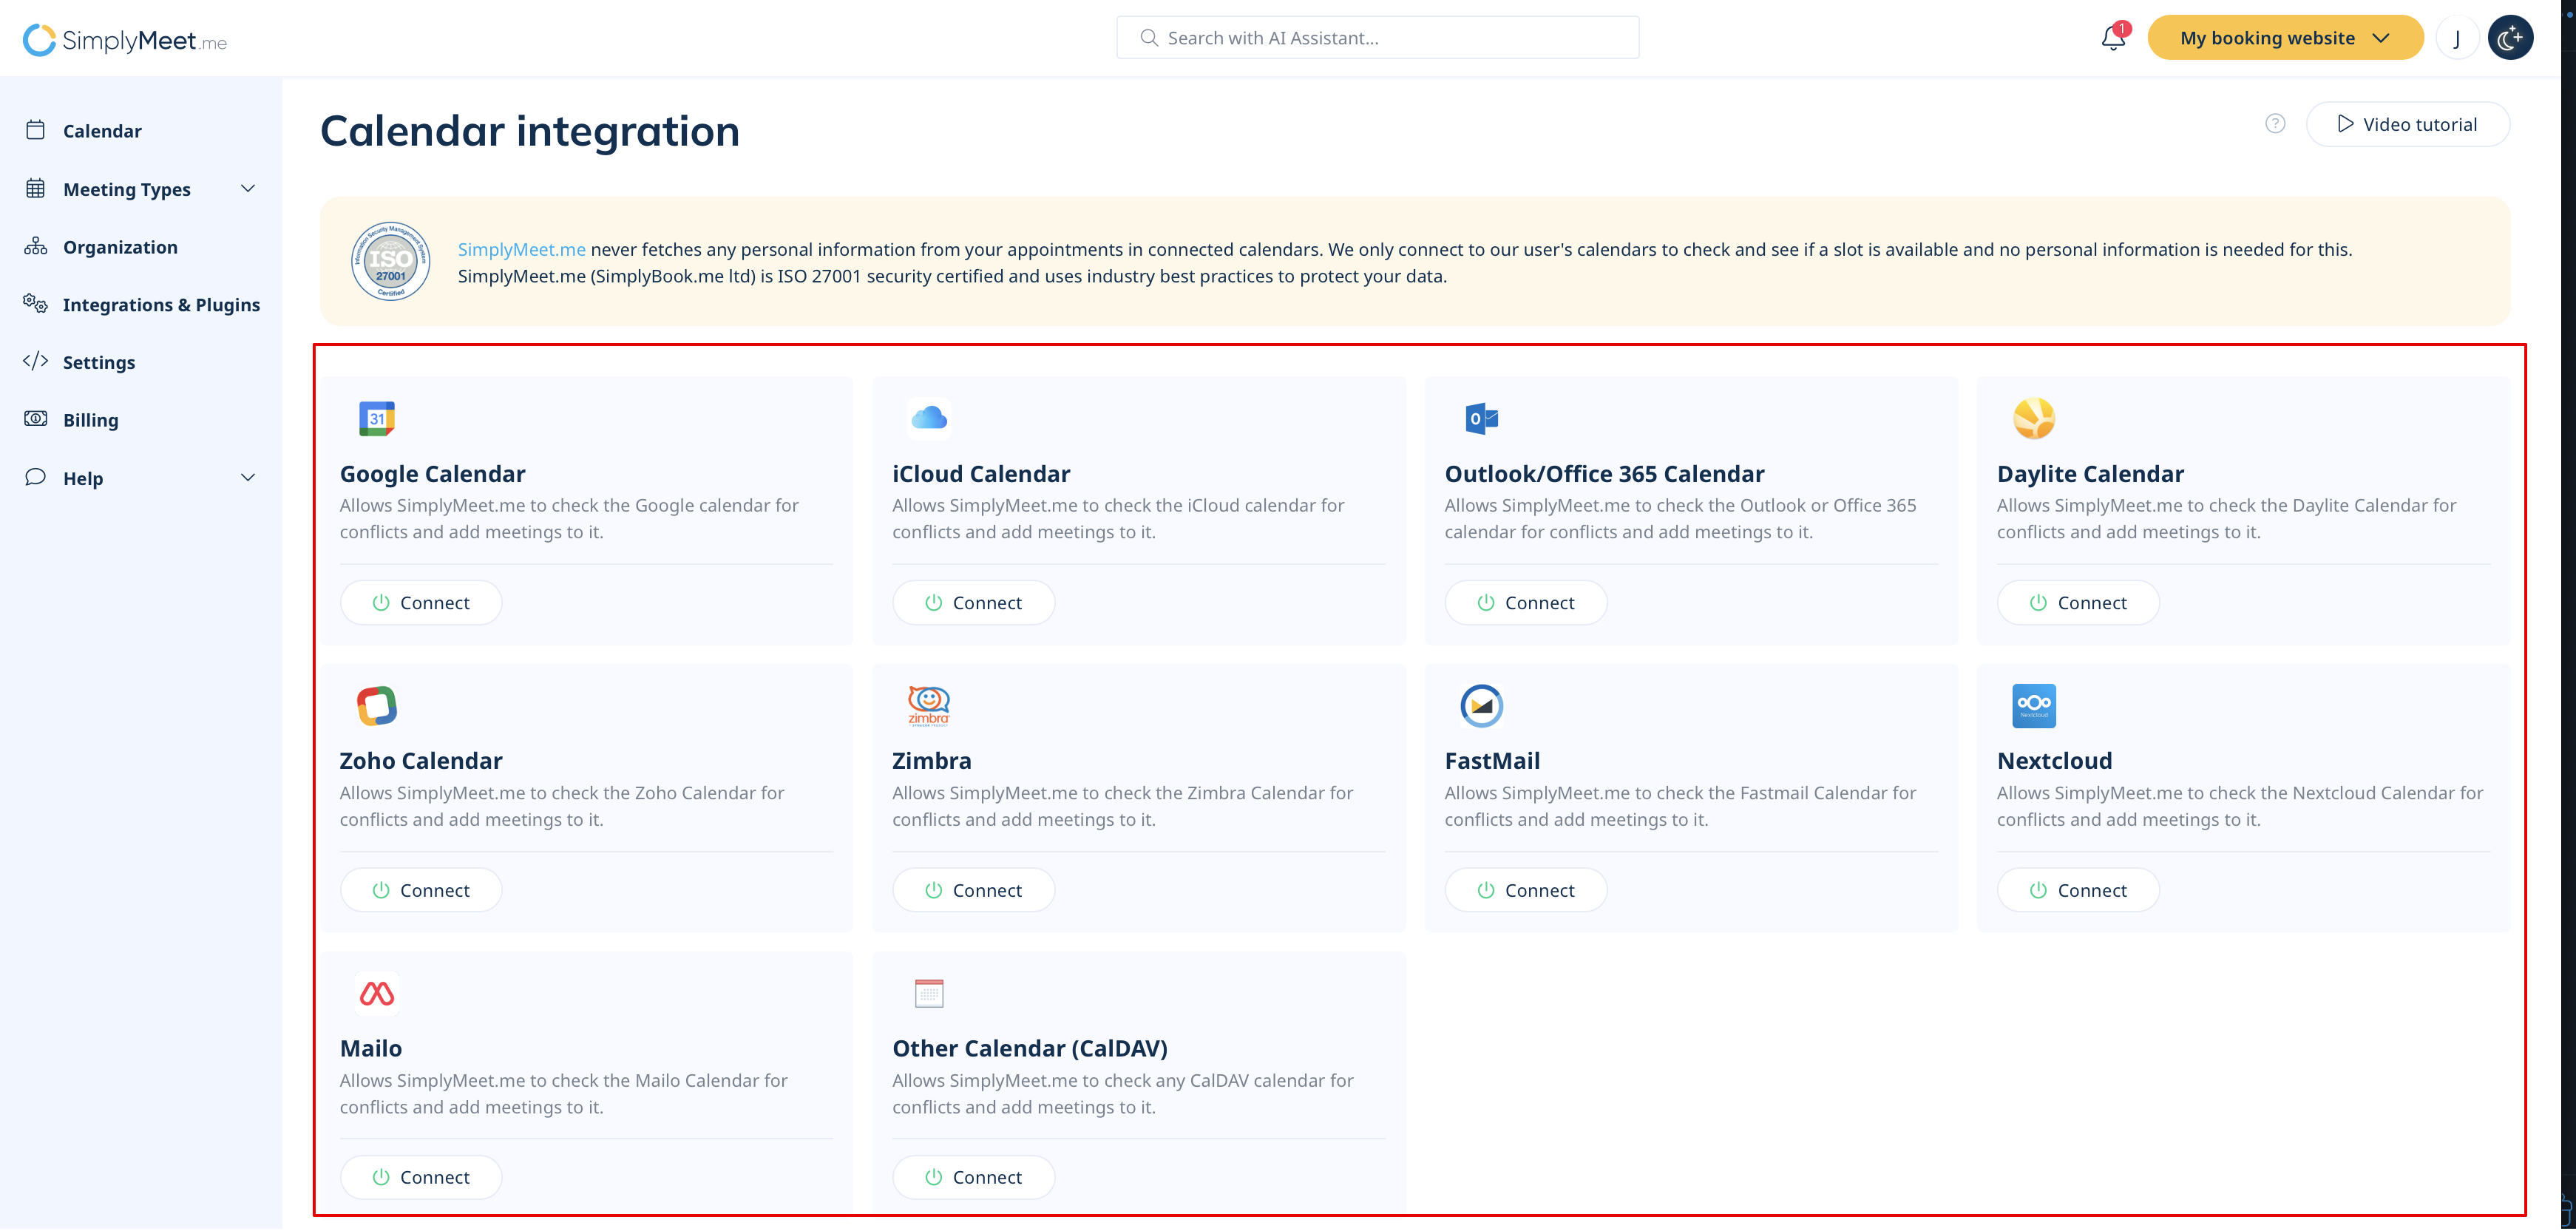
3. To connect your calendar, click Connect next to your calendar type.
Note: After clicking Connect, you will either be redirected to your calendar provider to complete the integration automatically, or you’ll see a page with step-by-step instructions for manual setup, including where to enter your credentials.
4. Once the calendar is connected, you’ll see the details of the currently linked calendar.
Step 2. Customize a Meeting Type
Meeting Types help you customize your availability, time zone, meeting duration, email reminders and more of your meetings.
- Go to Meeting Types page.
- Edit the default meeting type or create a new one with your custom availability and configuration.
- (optional) You can select the specific calendars to be checked for conflicts per each meeting type if necessary. This settings has higher priority than the one in Calendar integrations.
Note! If you have different calendars checked for conflicts per meeting type, it will be possible to have booked meetings for one and the same date&time for different meeting types.


Right now that you have the Calendar connected and your first meeting type created, you can share your booking page link with your invitees.
The link to your scheduling page is available in the top right corner.

The booking page will show your availability according to your connected calendar and the configured meeting type.
By default, the newly created meeting type defines the following availability rules:
- I'm unavailable on Saturdays and Sundays.
- I'm available from 8 am to 4 pm from Monday to Friday.
You can change these rules according to your needs in the Meeting Type configuration later on.
Step 4. Schedule a Meeting
Open your booking page link in the browser and book a test meeting with yourself.
But wait ... there’s more!
Once you’ve got these steps under control, there’s plenty more to explore in SimplyMeet.me.
- Add your branding. Use SimplyMeet.me from your domain.
- Customize the scheduling page so it matches your brand.
- Create a dedicated scheduling system for your organization.
- Integrate with Microsoft Teams and many more applications.
Continue your journey with SimplyMeet.me by checking out our Knowledge Base or reaching out to our helpful support team to hone your SimplyMeet.me experience.