From SimplyMeet.me
Replaced content with "TUTORIAL COMING SOON" Tag: Replaced |
No edit summary |
||
| Line 1: | Line 1: | ||
<p> | |||
SMTP integration allows you to send all the notifications from your own email address instead of default [mailto:no-reply@simplymeet.me no-reply@simplymeet.me] and look much more professional in your communications with the customers. | |||
</p> | |||
==Configuring SMTP integration== | |||
<p> | |||
:1. Navigate to '''[https://secure.simplymeet.me/integrations Integrations]''' page in your account and find '''SMTP Email''' option there | |||
</p> | |||
<p> | |||
:2. Click on '''Enable''' to get to the integration setup page. | |||
</p> | |||
<p> | |||
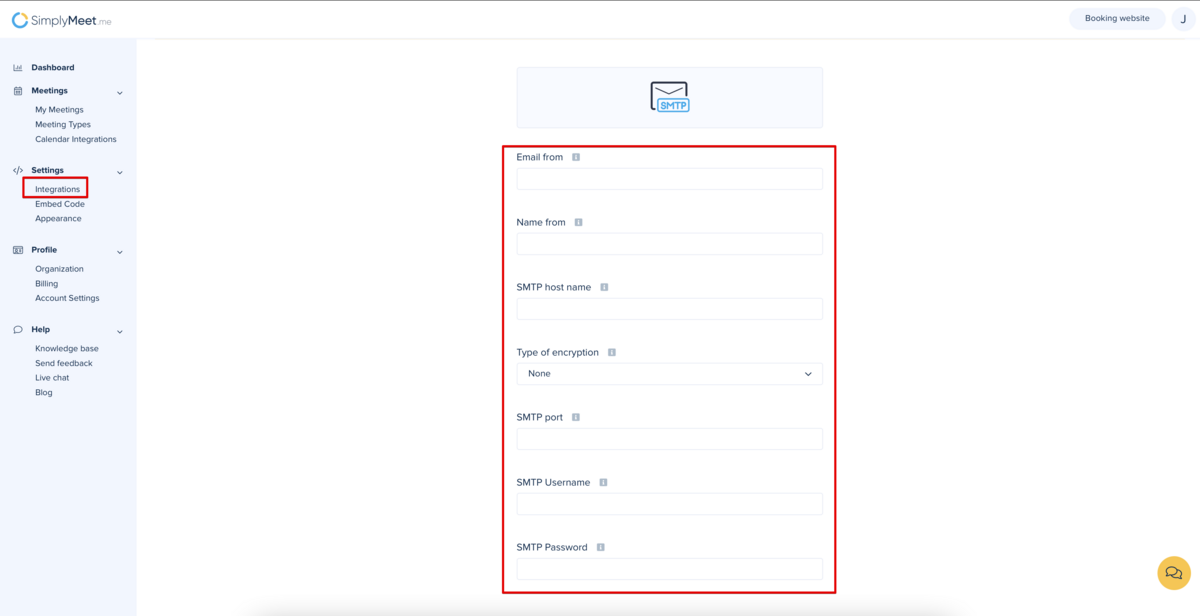
:3. Add your SMTP server credentials to the corresponding fields. | |||
[[File:Simplymeet smtp integration settings.png|1200px|center|link=https://help.simplymeet.me/images/6/64/Simplymeet_smtp_integration_settings.png]] | |||
</p> | |||
<p> | |||
:4. Save settings and you are ready. | |||
</p> | |||
Revision as of 12:21, 21 July 2022
SMTP integration allows you to send all the notifications from your own email address instead of default no-reply@simplymeet.me and look much more professional in your communications with the customers.
Configuring SMTP integration
- 1. Navigate to Integrations page in your account and find SMTP Email option there
- 2. Click on Enable to get to the integration setup page.
- 3. Add your SMTP server credentials to the corresponding fields.

- 4. Save settings and you are ready.