From SimplyMeet.me
No edit summary |
No edit summary |
||
| (5 intermediate revisions by the same user not shown) | |||
| Line 1: | Line 1: | ||
<p> | |||
SMTP integration allows you to send all the notifications from your own email address instead of default [mailto:no-reply@simplymeet.me no-reply@simplymeet.me] and look much more professional in your communications with the customers.<br> | |||
It can be set on the user level if you are the owner of the single account or on the organization level if you have a paid accounts with several employees. | |||
</p> | |||
==Configuring SMTP integration== | |||
<p> | |||
:1. Navigate to '''[https://secure.simplymeet.me/integrations Integrations]''' page in your account.<br> | |||
:Then find '''SMTP Email for user''' option if you wish to set it on the user level. | |||
:Or '''SMTP Email for Organization'''* if you wish to use it for the organization. | |||
</p> | </p> | ||
<p | <p> | ||
:2. Click on '''Enable''' to get to the integration setup page. | |||
</p> | </p> | ||
<p | <p> | ||
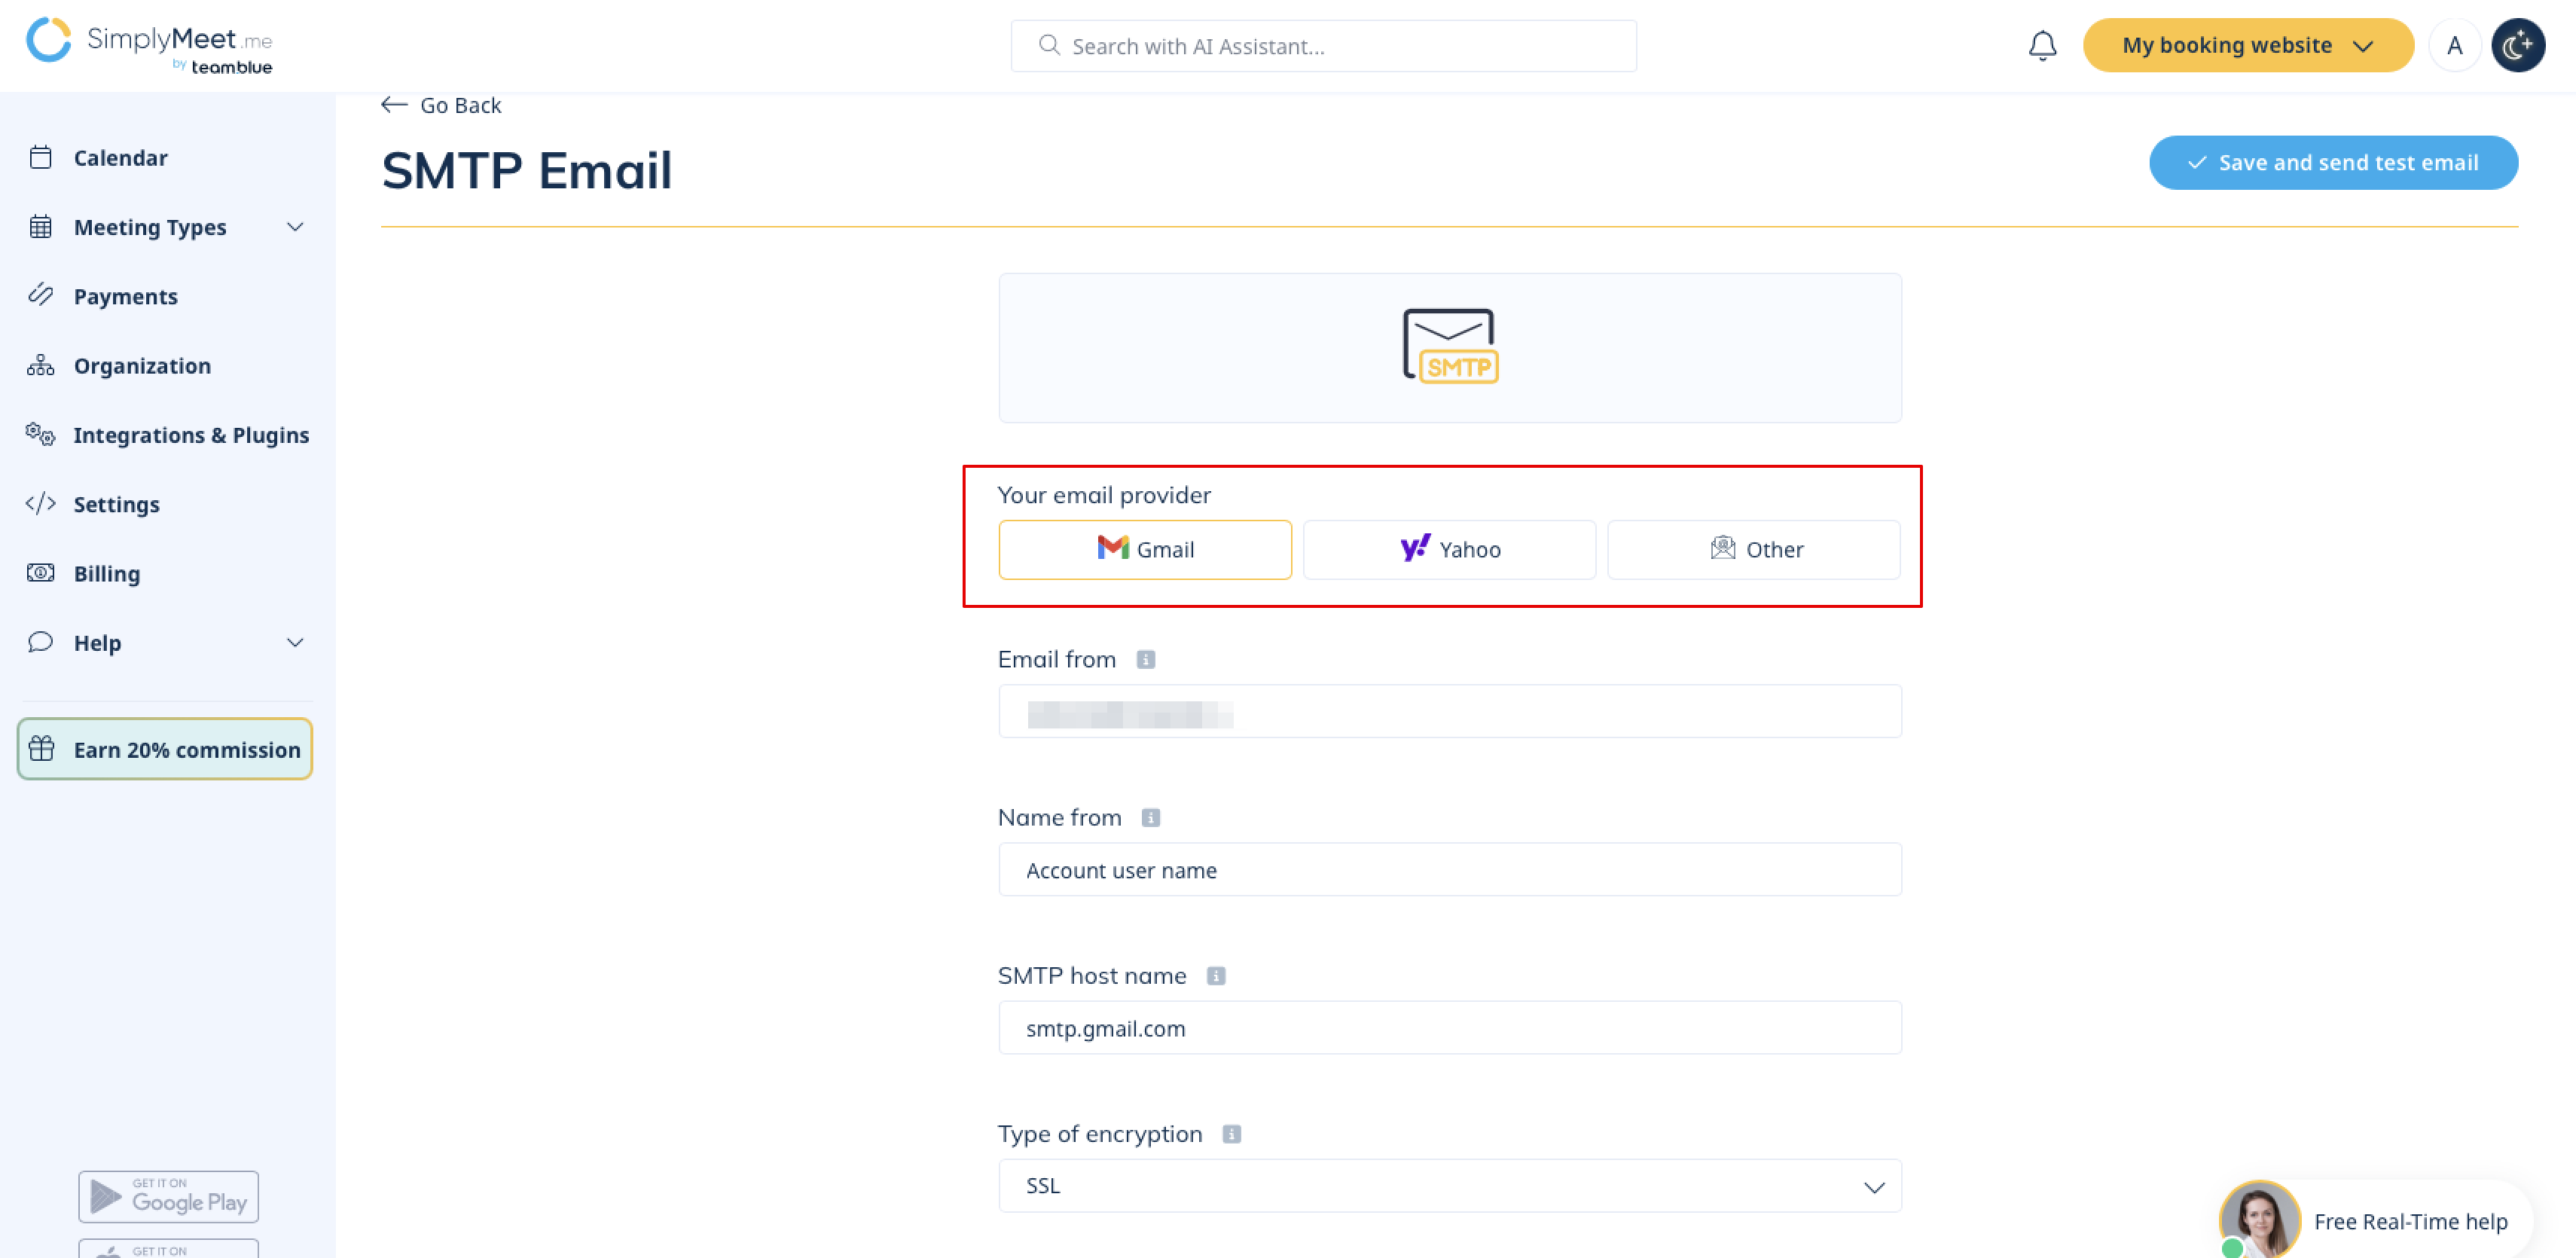
:3. Select SMTP server from the suggested ones to pre-fill the details, fill in the missing details or if it is not listed please add your SMTP server credentials to the corresponding fields.<br> | |||
[[File:Sm smtp settings new.png|1200px|center|link=https://help.simplymeet.me/images/5/5e/Sm_smtp_settings_new.png]] | |||
</p> | </p> | ||
<p | <p> | ||
:4. Save settings and you are ready. | |||
</p> | </p> | ||
<nowiki>*</nowiki>You can also have both levels enabled and decide whether to set organization level as a priority or not.<br> | |||
'''Please note!''' If this option is "On" all the emails will be processed through organisation SMTP account. If you disable it then each user integration will be used for emails. | |||
Latest revision as of 08:11, 6 April 2026
SMTP integration allows you to send all the notifications from your own email address instead of default no-reply@simplymeet.me and look much more professional in your communications with the customers.
It can be set on the user level if you are the owner of the single account or on the organization level if you have a paid accounts with several employees.
Configuring SMTP integration
- 1. Navigate to Integrations page in your account.
- Then find SMTP Email for user option if you wish to set it on the user level.
- Or SMTP Email for Organization* if you wish to use it for the organization.
- 2. Click on Enable to get to the integration setup page.
- 3. Select SMTP server from the suggested ones to pre-fill the details, fill in the missing details or if it is not listed please add your SMTP server credentials to the corresponding fields.
- 4. Save settings and you are ready.
*You can also have both levels enabled and decide whether to set organization level as a priority or not.
Please note! If this option is "On" all the emails will be processed through organisation SMTP account. If you disable it then each user integration will be used for emails.