From SimplyMeet.me
No edit summary |
No edit summary |
||
| (One intermediate revision by the same user not shown) | |||
| Line 16: | Line 16: | ||
</div> | </div> | ||
<p class="no-margin"> | <p class="no-margin"> | ||
3. Go to [https:// | 3. Go to [https://secure.simplymeet.me/calendars Calendar Integration] in SimplyMeet.me | ||
</p> | </p> | ||
<p class="no-margin"> | <p class="no-margin"> | ||
| Line 22: | Line 22: | ||
</p> | </p> | ||
<div class="intercom-container"> | <div class="intercom-container"> | ||
[[File: | [[File:Simplymeet caldav calendar path.png|1200px|center]] | ||
</div> | </div> | ||
<p class="no-margin"> | <p class="no-margin"> | ||
Latest revision as of 14:35, 23 November 2021
In order to be able to add meetings to your NextCloud Calendar you need to connect your NextCloud account with SimplyMeet.me.
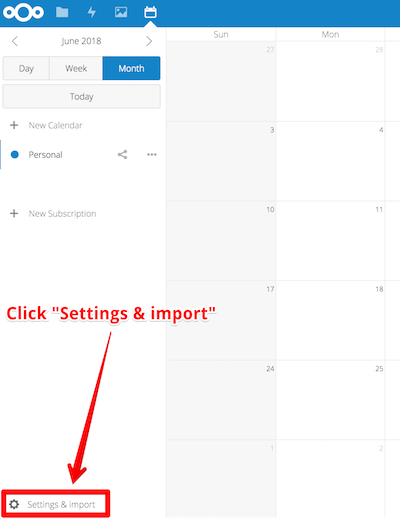
1. First, navigate to your NextCloud Calendar account and click Settings & import
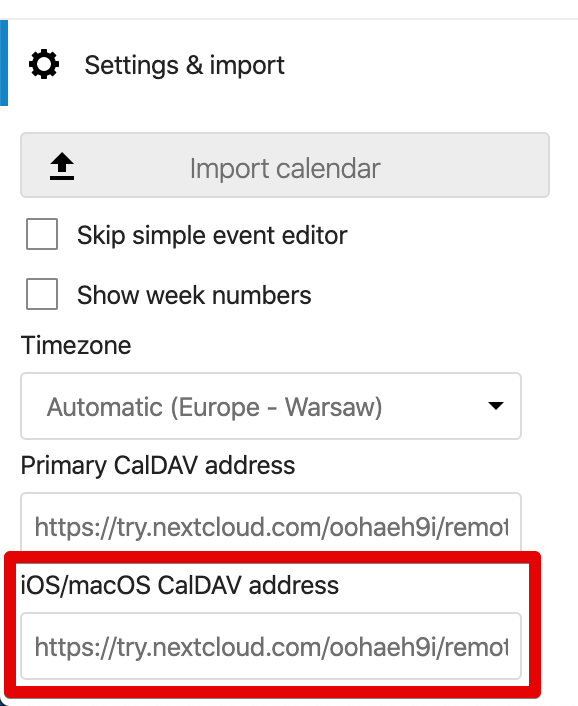
2. Copy the value of iOS/OS X CalDAV address field
3. Go to Calendar Integration in SimplyMeet.me
4. Click "Connect" button in CalDAV Calendar section
5. Next, paste the copied value of iOS/OS X CalDAV address field from you NextCloud Calendar account into Server URL field. For username and password fields use your NextCloud credentials (use an app-specific password if using two-factor authentication).
6. That's it! Your NextCloud Calendar should be now connected.


