From SimplyMeet.me
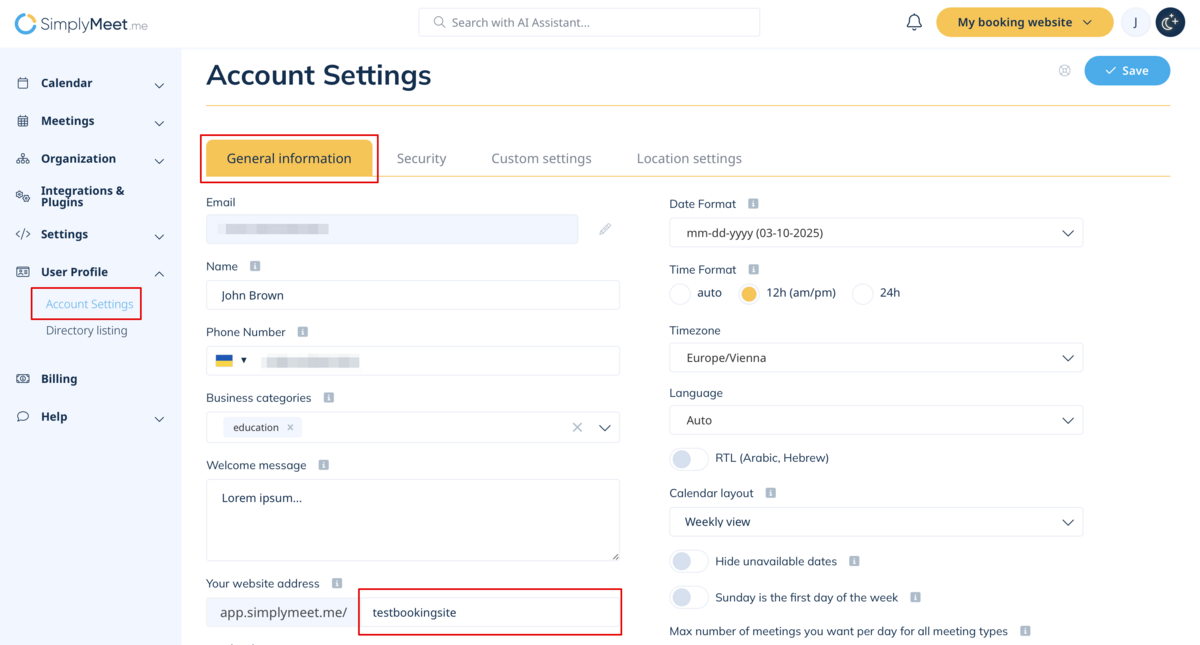
Created page with "<p class="intercom-align-left"> Follow the steps below to change your scheduling page link. </p> <ol> <li>Click the <strong>Account Settings</strong> link on the left side o..." |
No edit summary |
||
| (2 intermediate revisions by the same user not shown) | |||
| Line 2: | Line 2: | ||
Follow the steps below to change your scheduling page link. | Follow the steps below to change your scheduling page link. | ||
</p> | </p> | ||
< | <p class="intercom-align-left"> | ||
1. Click the <strong>Account Settings</strong> link on the left side of your dashboard. | |||
</ | </p> | ||
<div class="intercom-container intercom-align-left"> | <div class="intercom-container intercom-align-left"> | ||
[[File: | [[File:Sm website address change new.png|1200px|center|link=https://help.simplymeet.me/images/5/5a/Sm_website_address_change_new.png]] | ||
</div> | </div> | ||
<p class="intercom-align-left"> | <p class="intercom-align-left"> | ||
2. Rename your Link and click <strong>Save</strong>. | |||
</p> | </p> | ||
<div class="intercom-container intercom-align-left"> | <div class="intercom-container intercom-align-left"> | ||
</div> | </div> | ||
